容器化docker技术
Docker入门
一、Docker简介
Docker 就像一个盒子,里面可以装很多物件,如果需要某些物件,可以直接将该盒子拿走,而不需要从该盒子中一件一件的取。
Docker 包括三个基本概念:
镜像(Image)
Docker的镜像概念类似于虚拟机里的镜像(比如.ISO文件),是一个只读的模板,一个独立的文件系统,包括运行容器所需的数据,可以用来创建新的容器。
例如:一个镜像可以包含一个完整的 ubuntu 操作系统环境,里面仅安装了MySQL或用户需要的其它应用程序。
这里的镜像就如下方虚拟机创建时候使用的镜像类似。这个镜像便于移动,并且这个镜像我们可以交给任何人使用,其他人使用的时候也很方便,只需要将其实例化即可。

容器(Container) Docker容器是由Docker镜像创建的运行实例,类似VM虚拟机,支持启动,停止,删除等。
每个容器间是相互隔离的,容器中会运行特定的应用,包含特定应用的代码及所需的依赖文件。
容器就类似与虚拟机中我们创建好的虚拟机系统,之后我们所有的操作都是在容器中进行的,我们的程序也是运行在容器中。
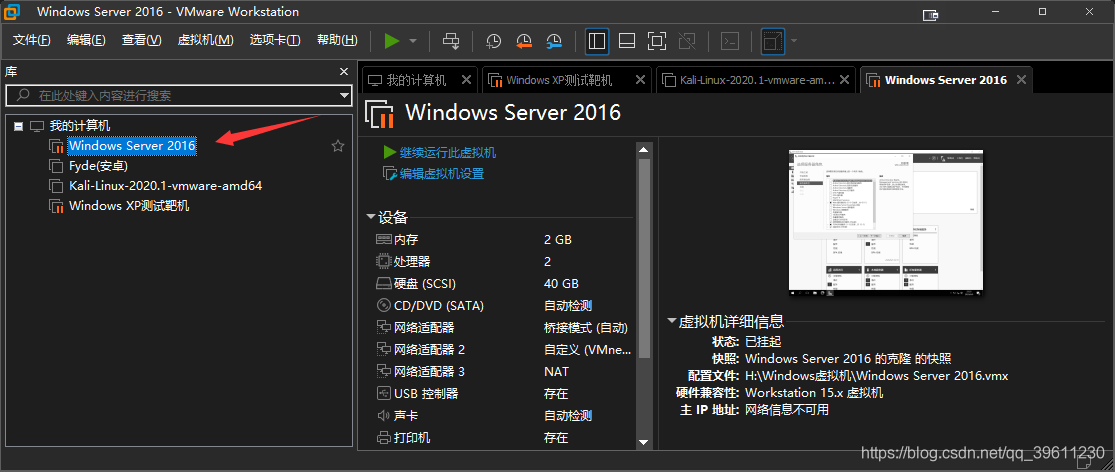
仓库(Repository) 镜像便于传播,而仓库就是专门用来传播这些镜像的地方,他有点类似与Github,或者你可以把他看成一个存放各种镜像的镜像商店。
Docker官方的仓库 : 他的服务器处于国外,所以下载速度较慢,不过我们可以通过换源解决。
daocloud国内仓库 : 国内也有一些优秀的商店,他和Docker官方的仓库的区别类似与Github和Gitee的区别。
二、Centos环境Docker安装
1、安装
第一种安装方式:
yum install docker -y

#Dokcer hub镜像加速
/etc/docker/daemon.json
{"registry-mirrors":["https://gg3gwnry.mirror.aliyuncs.com"]}
第二种安装方式:
#移除旧docker
sudo yum -y remove docker

#安装yum-utils
sudo yum install -y yum-utils

#docker仓库
sudo yum-config-manager \
    --add-repo \
    https://download.docker.com/linux/centos/docker-ce.repo

 #测试仓库安装
sudo yum-config-manager --enable docker-ce-test

#更新yum包索引
sudo yum makecache fast

#执行如下命令即可安装最新版本的Docker CE,这个安装耗时很久!!!
sudo yum install docker-ce docker-ce-cli containerd.io
小郭选择的是第二种安装方式(推荐),第二种安装方式安装的是官方最新版本。
在centos环境下,依次执行上面的第二种安装方式命令,命令都依次执行成功后,会显示下面的日志:

小郭今天安装完成后的docker是
25.0.0-beta.1版本
2、启动
#启动docker
sudo systemctl start docker

#运行测试镜像,检查是否安装正确
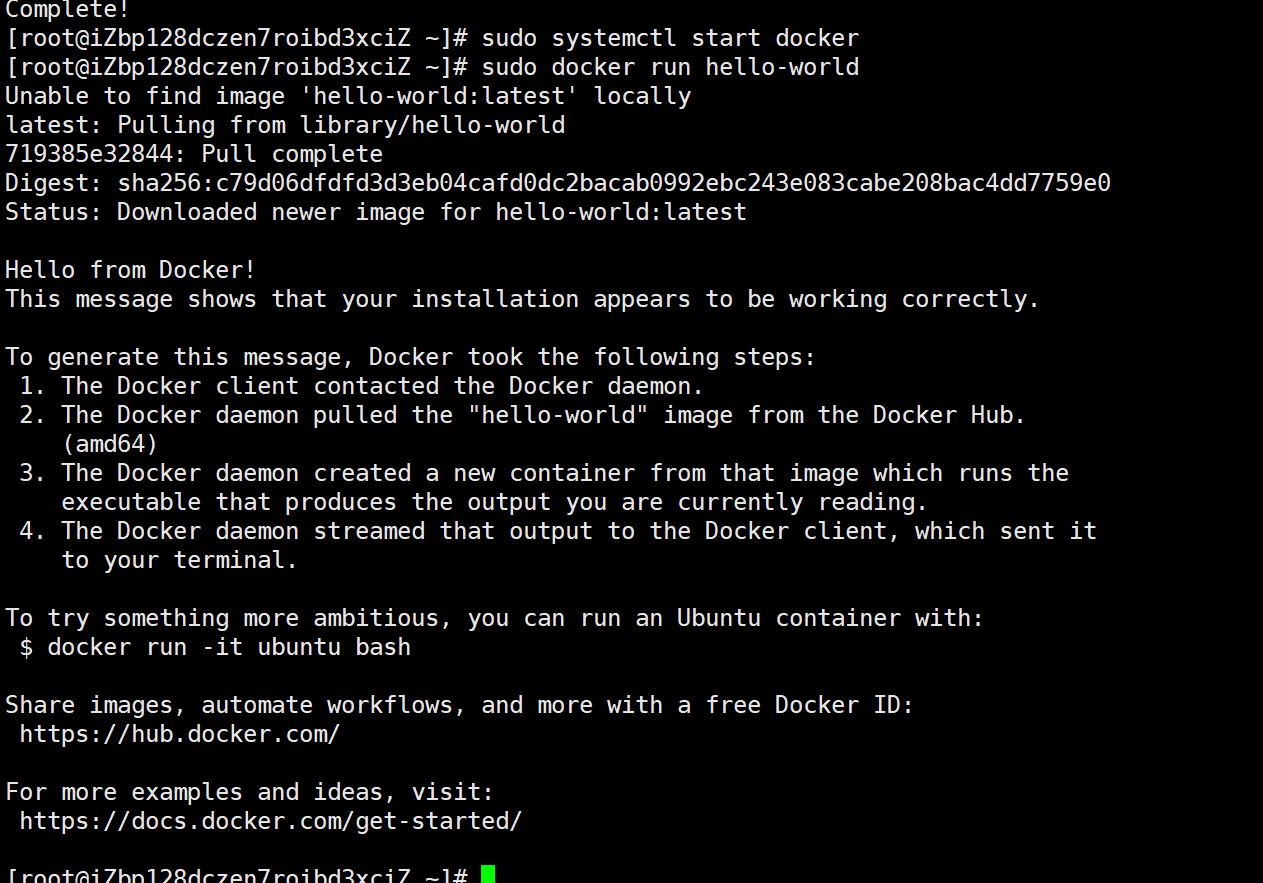
sudo docker run hello-world
出现下面的日志,代表我们的docker安装和运行都正常了!
3、遇到的问题
1)镜像下载慢问题
编辑daemon.json:
vi /etc/docker/daemon.json添加以下内容:
配置阿里云加速镜像,加快下载速度
{
  "registry-mirrors": ["https://hccwwfjl.mirror.aliyuncs.com"]
}
重新启动Docker
systemctl restart docker2)拉取镜像报错问题
错误信息:error pulling image configuration
原因:出现这个问题原因为网络问题,无法连接到 docker hub。 国内有 daocloud加速,docker指定该源即可。
echo "DOCKER_OPTS=\"\$DOCKER_OPTS --registry-mirror=http://f2d6cb40.m.daocloud.io\"" | sudo tee -a /etc/default/docker
DOCKER_OPTS="$DOCKER_OPTS --registry-mirror=http://f2d6cb40.m.daocloud.io"
三、Docker Desktop环境安装
Docker Desktop - The fastest way to containerize applications on your desktop 是Docker官方的定义。
Docker Desktop为Windows和Mac提供了一个桌面化的容器开发环境,在Windows 10上,Docker Desktop使用了Windows的Hyper-V虚拟化技术,因此需要一台打开了硬件虚化化的电脑并且安装的是Windows 10专业版以上的系统,还需要打开Hyper-V功能,如何在Windows 10上打开Hyper-V,参考这里
接下来演示如何在Windows系统上安装和使用Docker Desktop
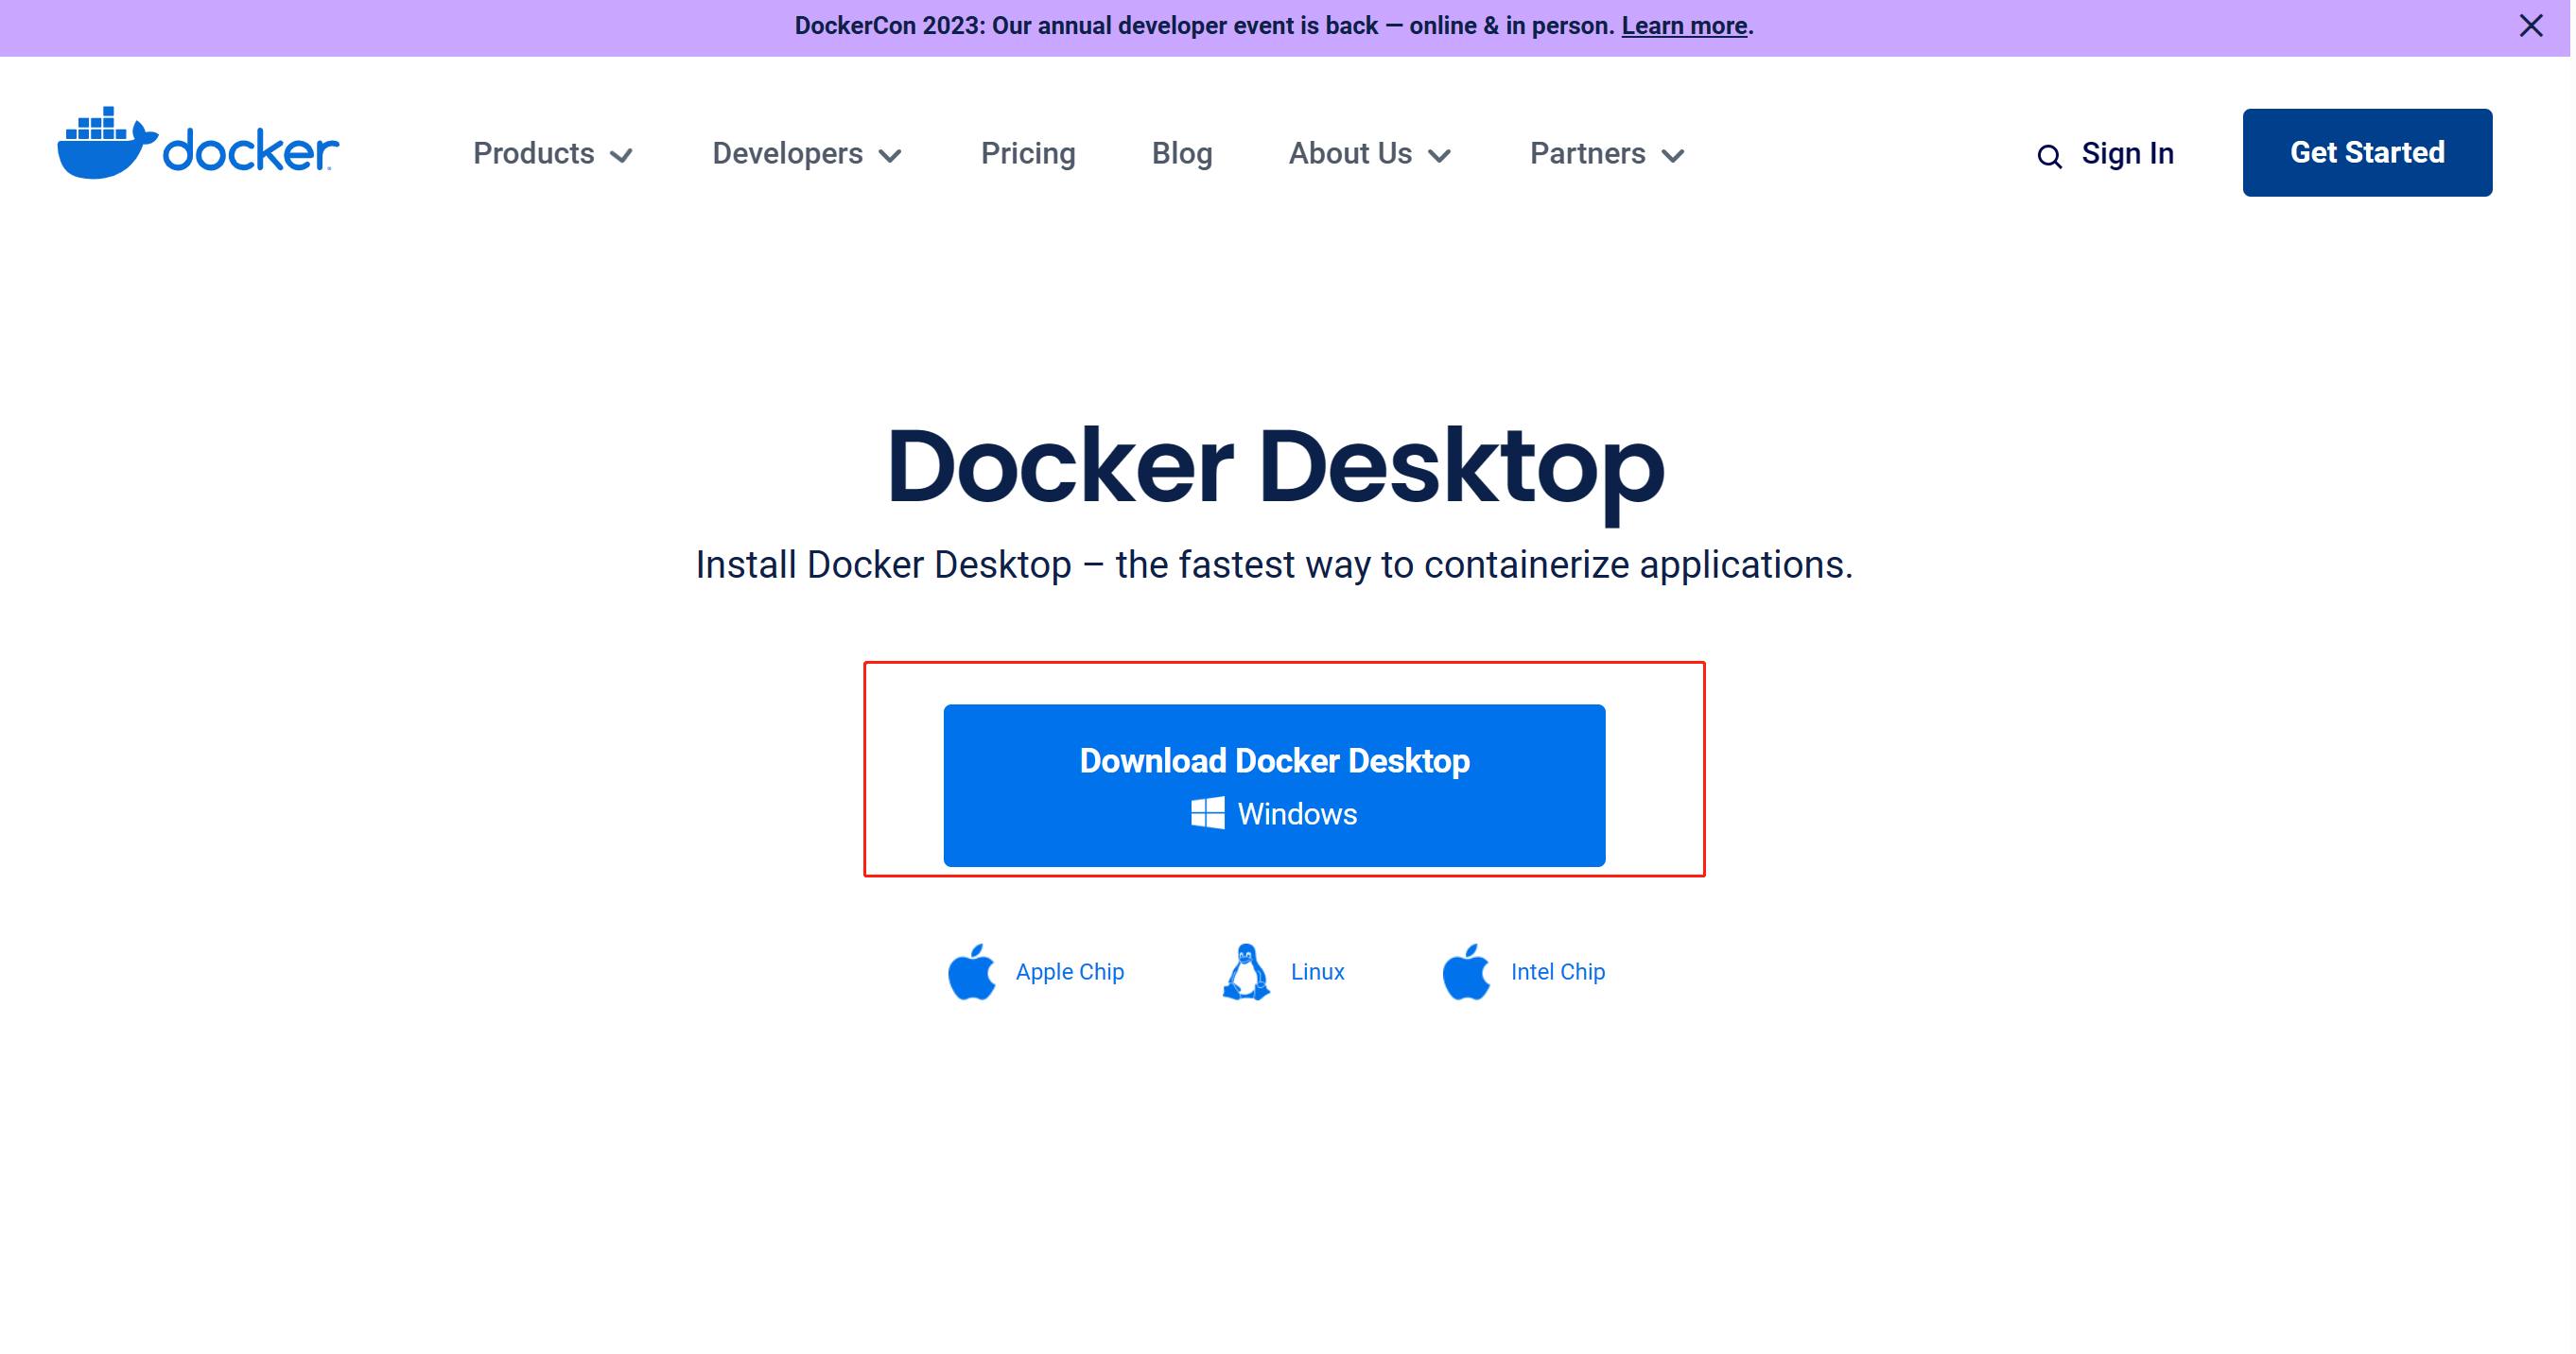
1、安装包下载
2、安装
打开安装包加载一会后一般会弹出下面选项,提示是否创建桌面快捷方式,这里勾选上。
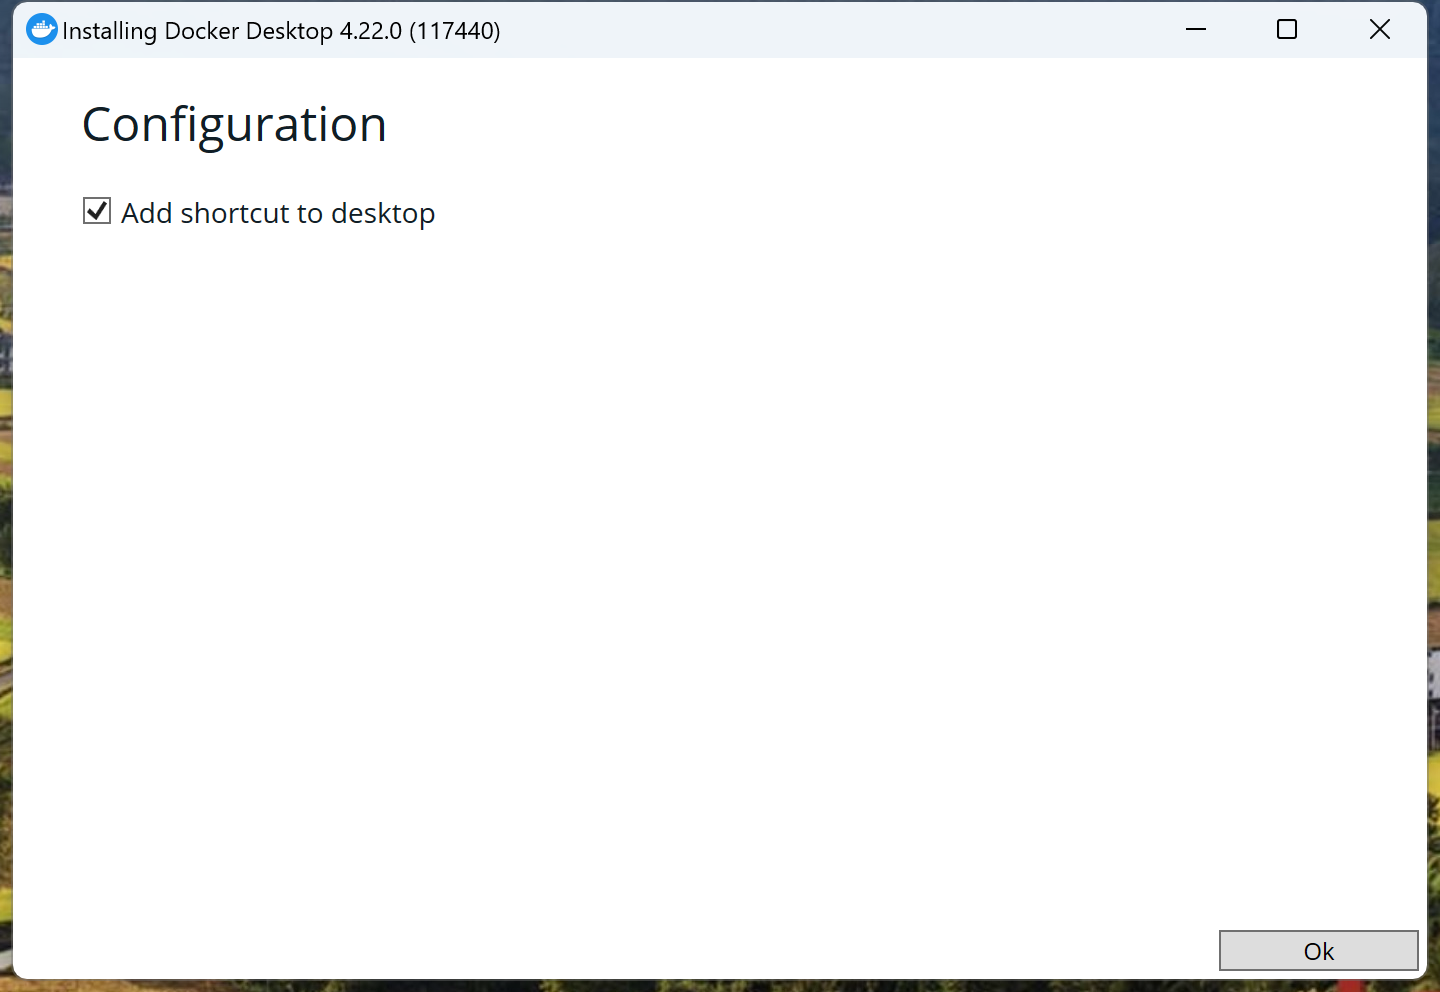
下一步等待安装完成,出现如下界面代表安装成功了 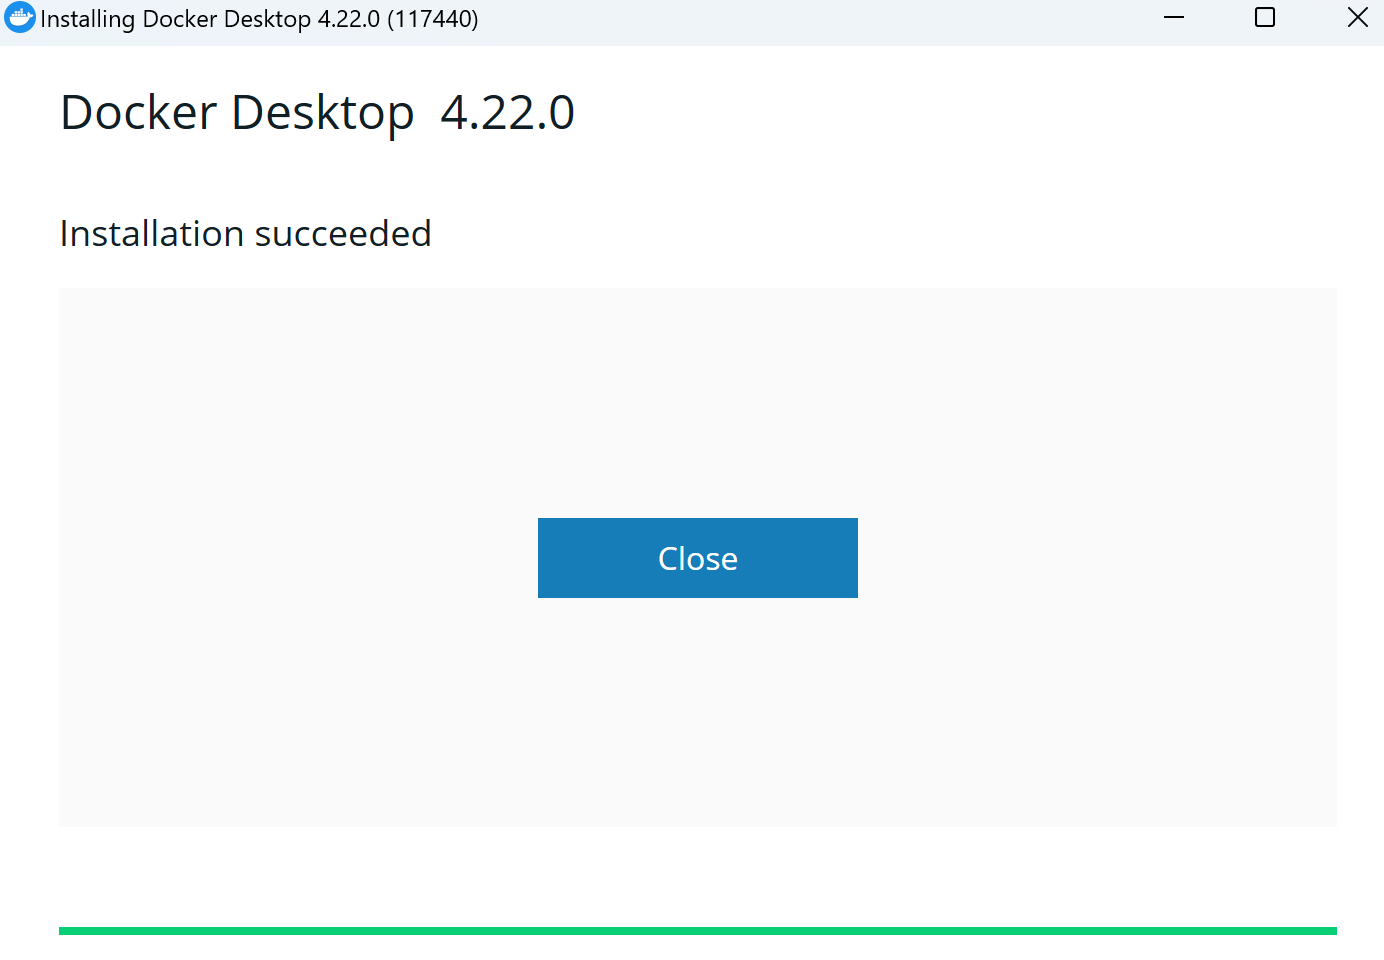
3、使用
双击桌面生成的快捷方式,进入程序主页
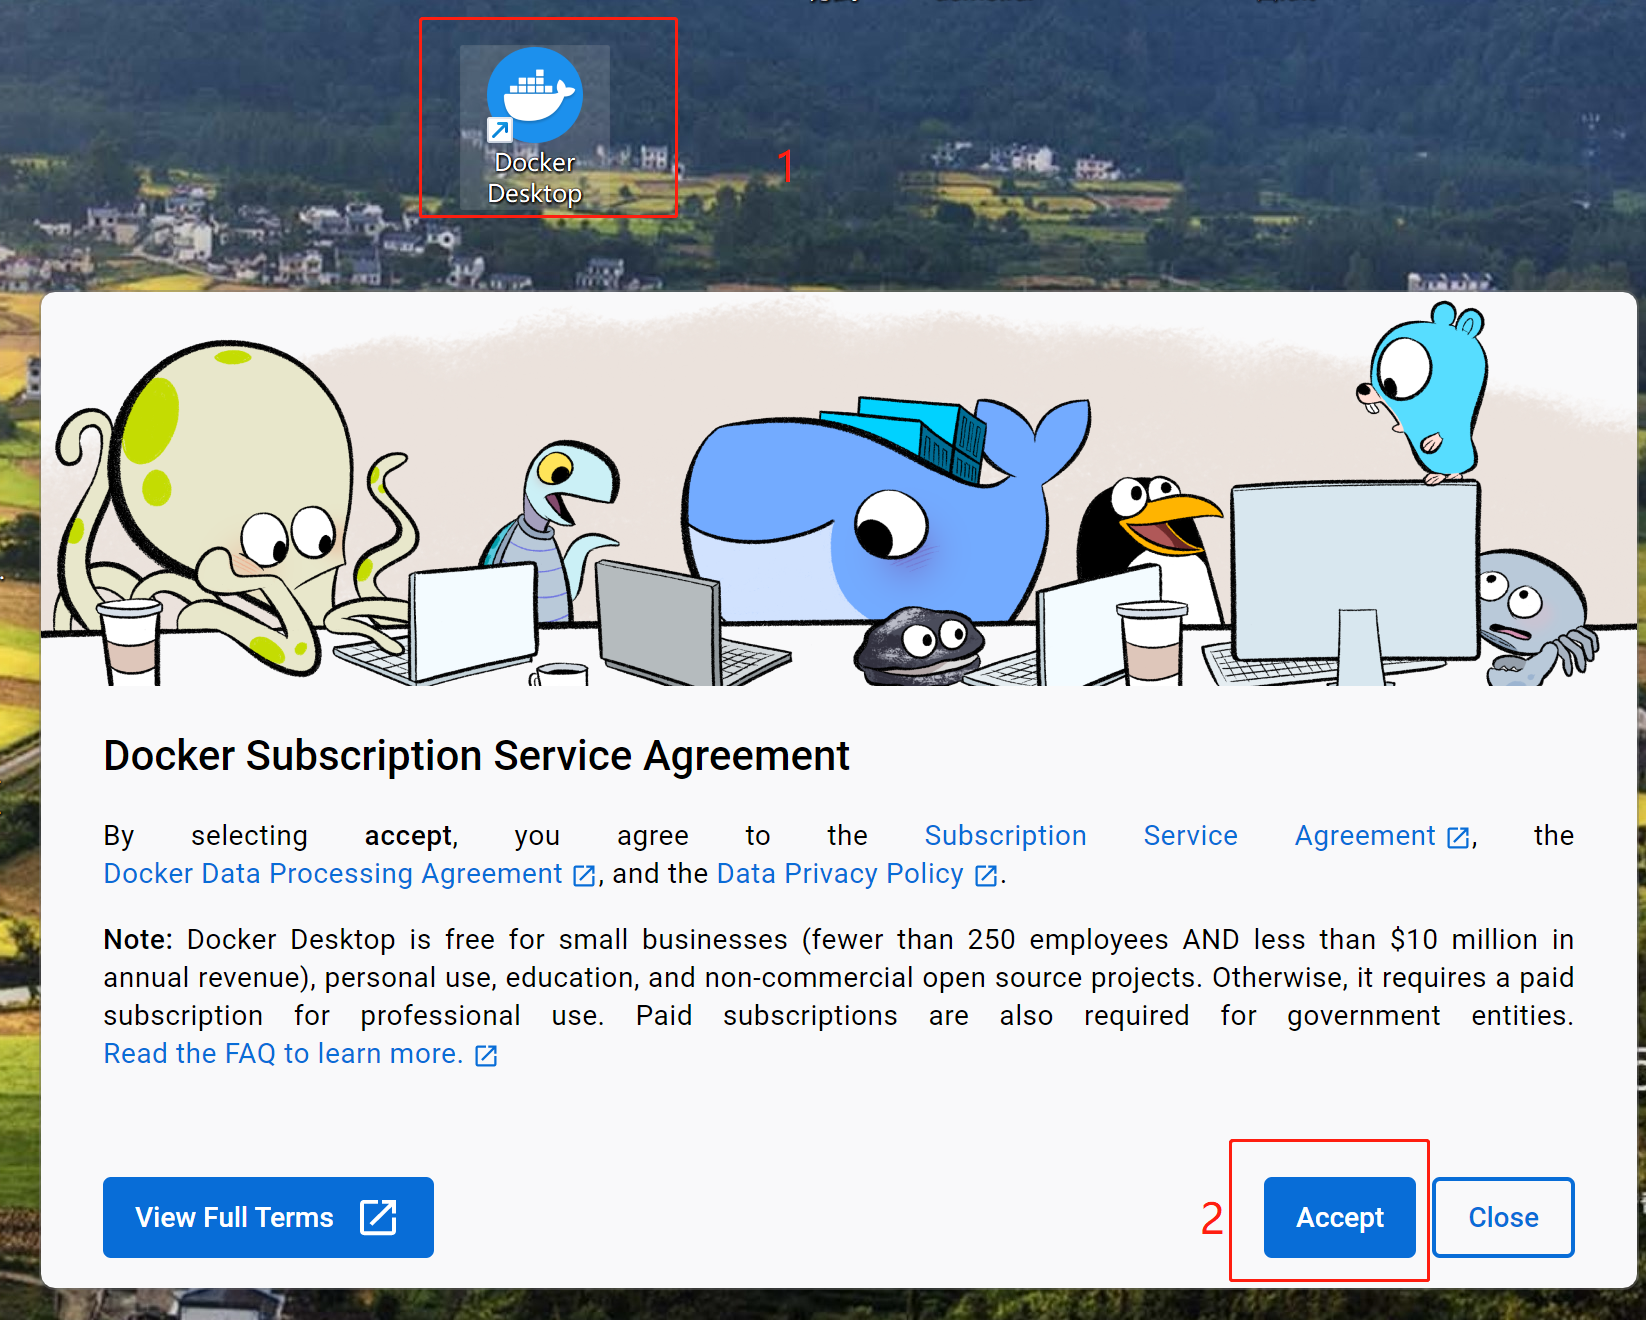
这里随便勾选一些,然后点击按钮【continue】继续 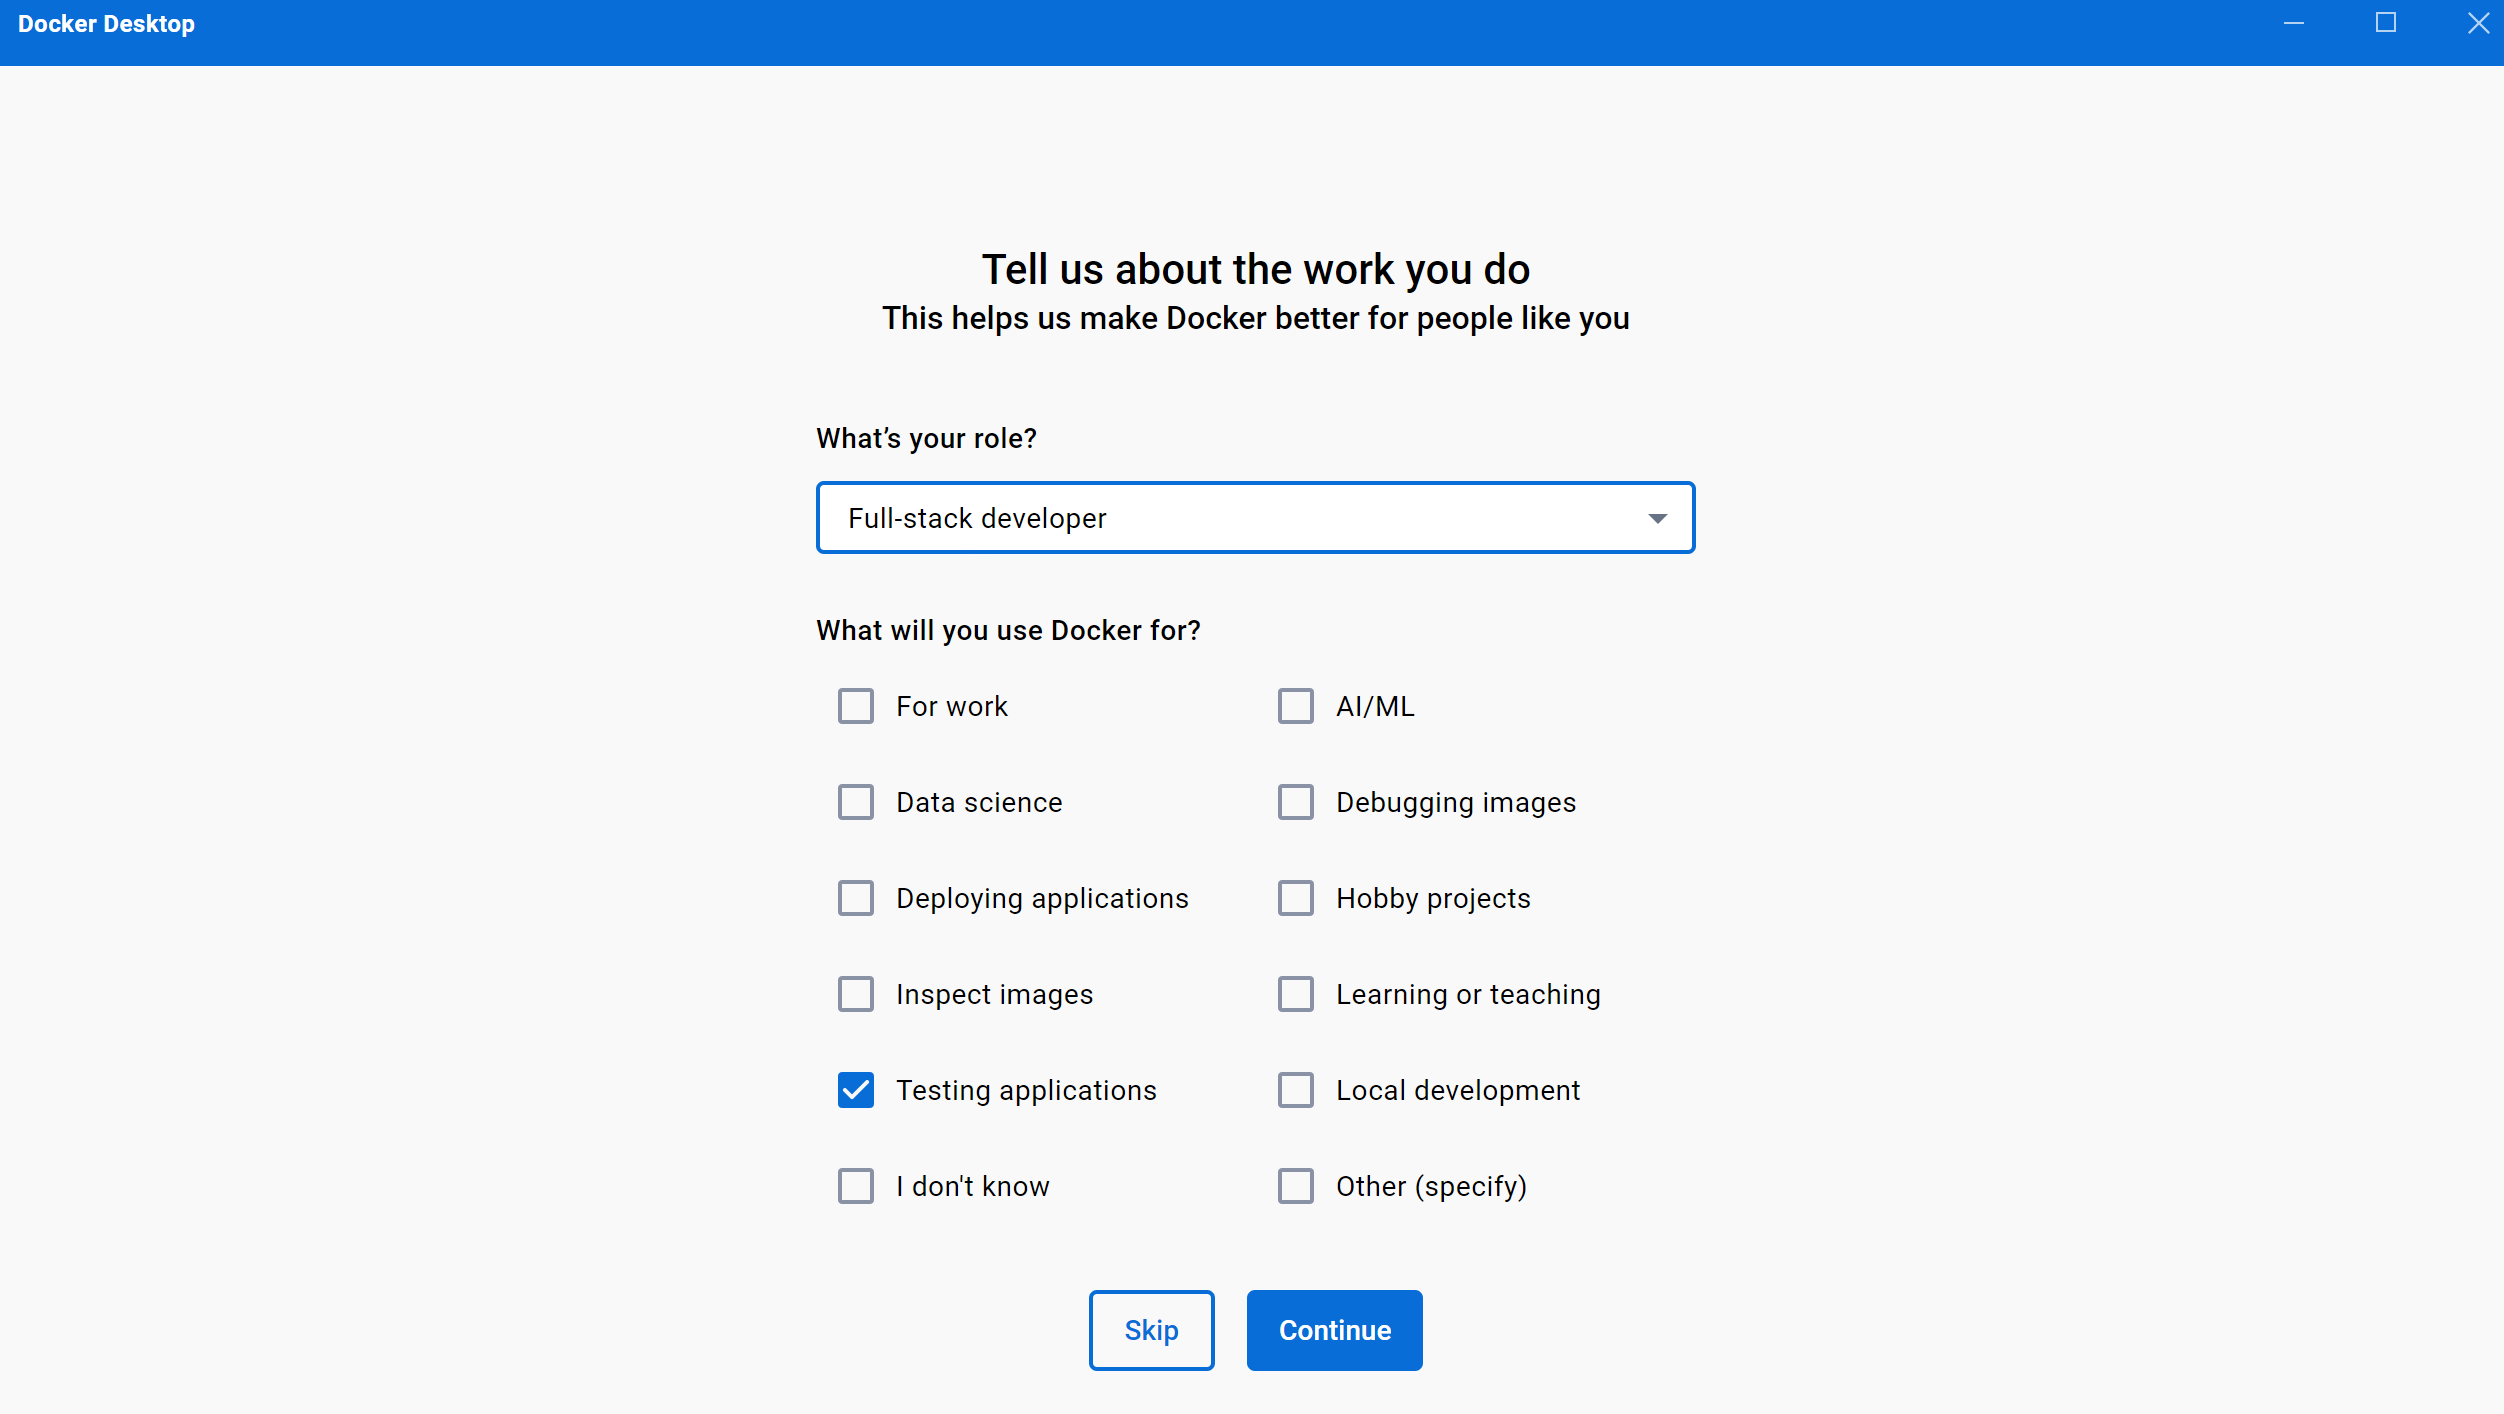
进入最后一步啦,这里可以选择登录自己的账户 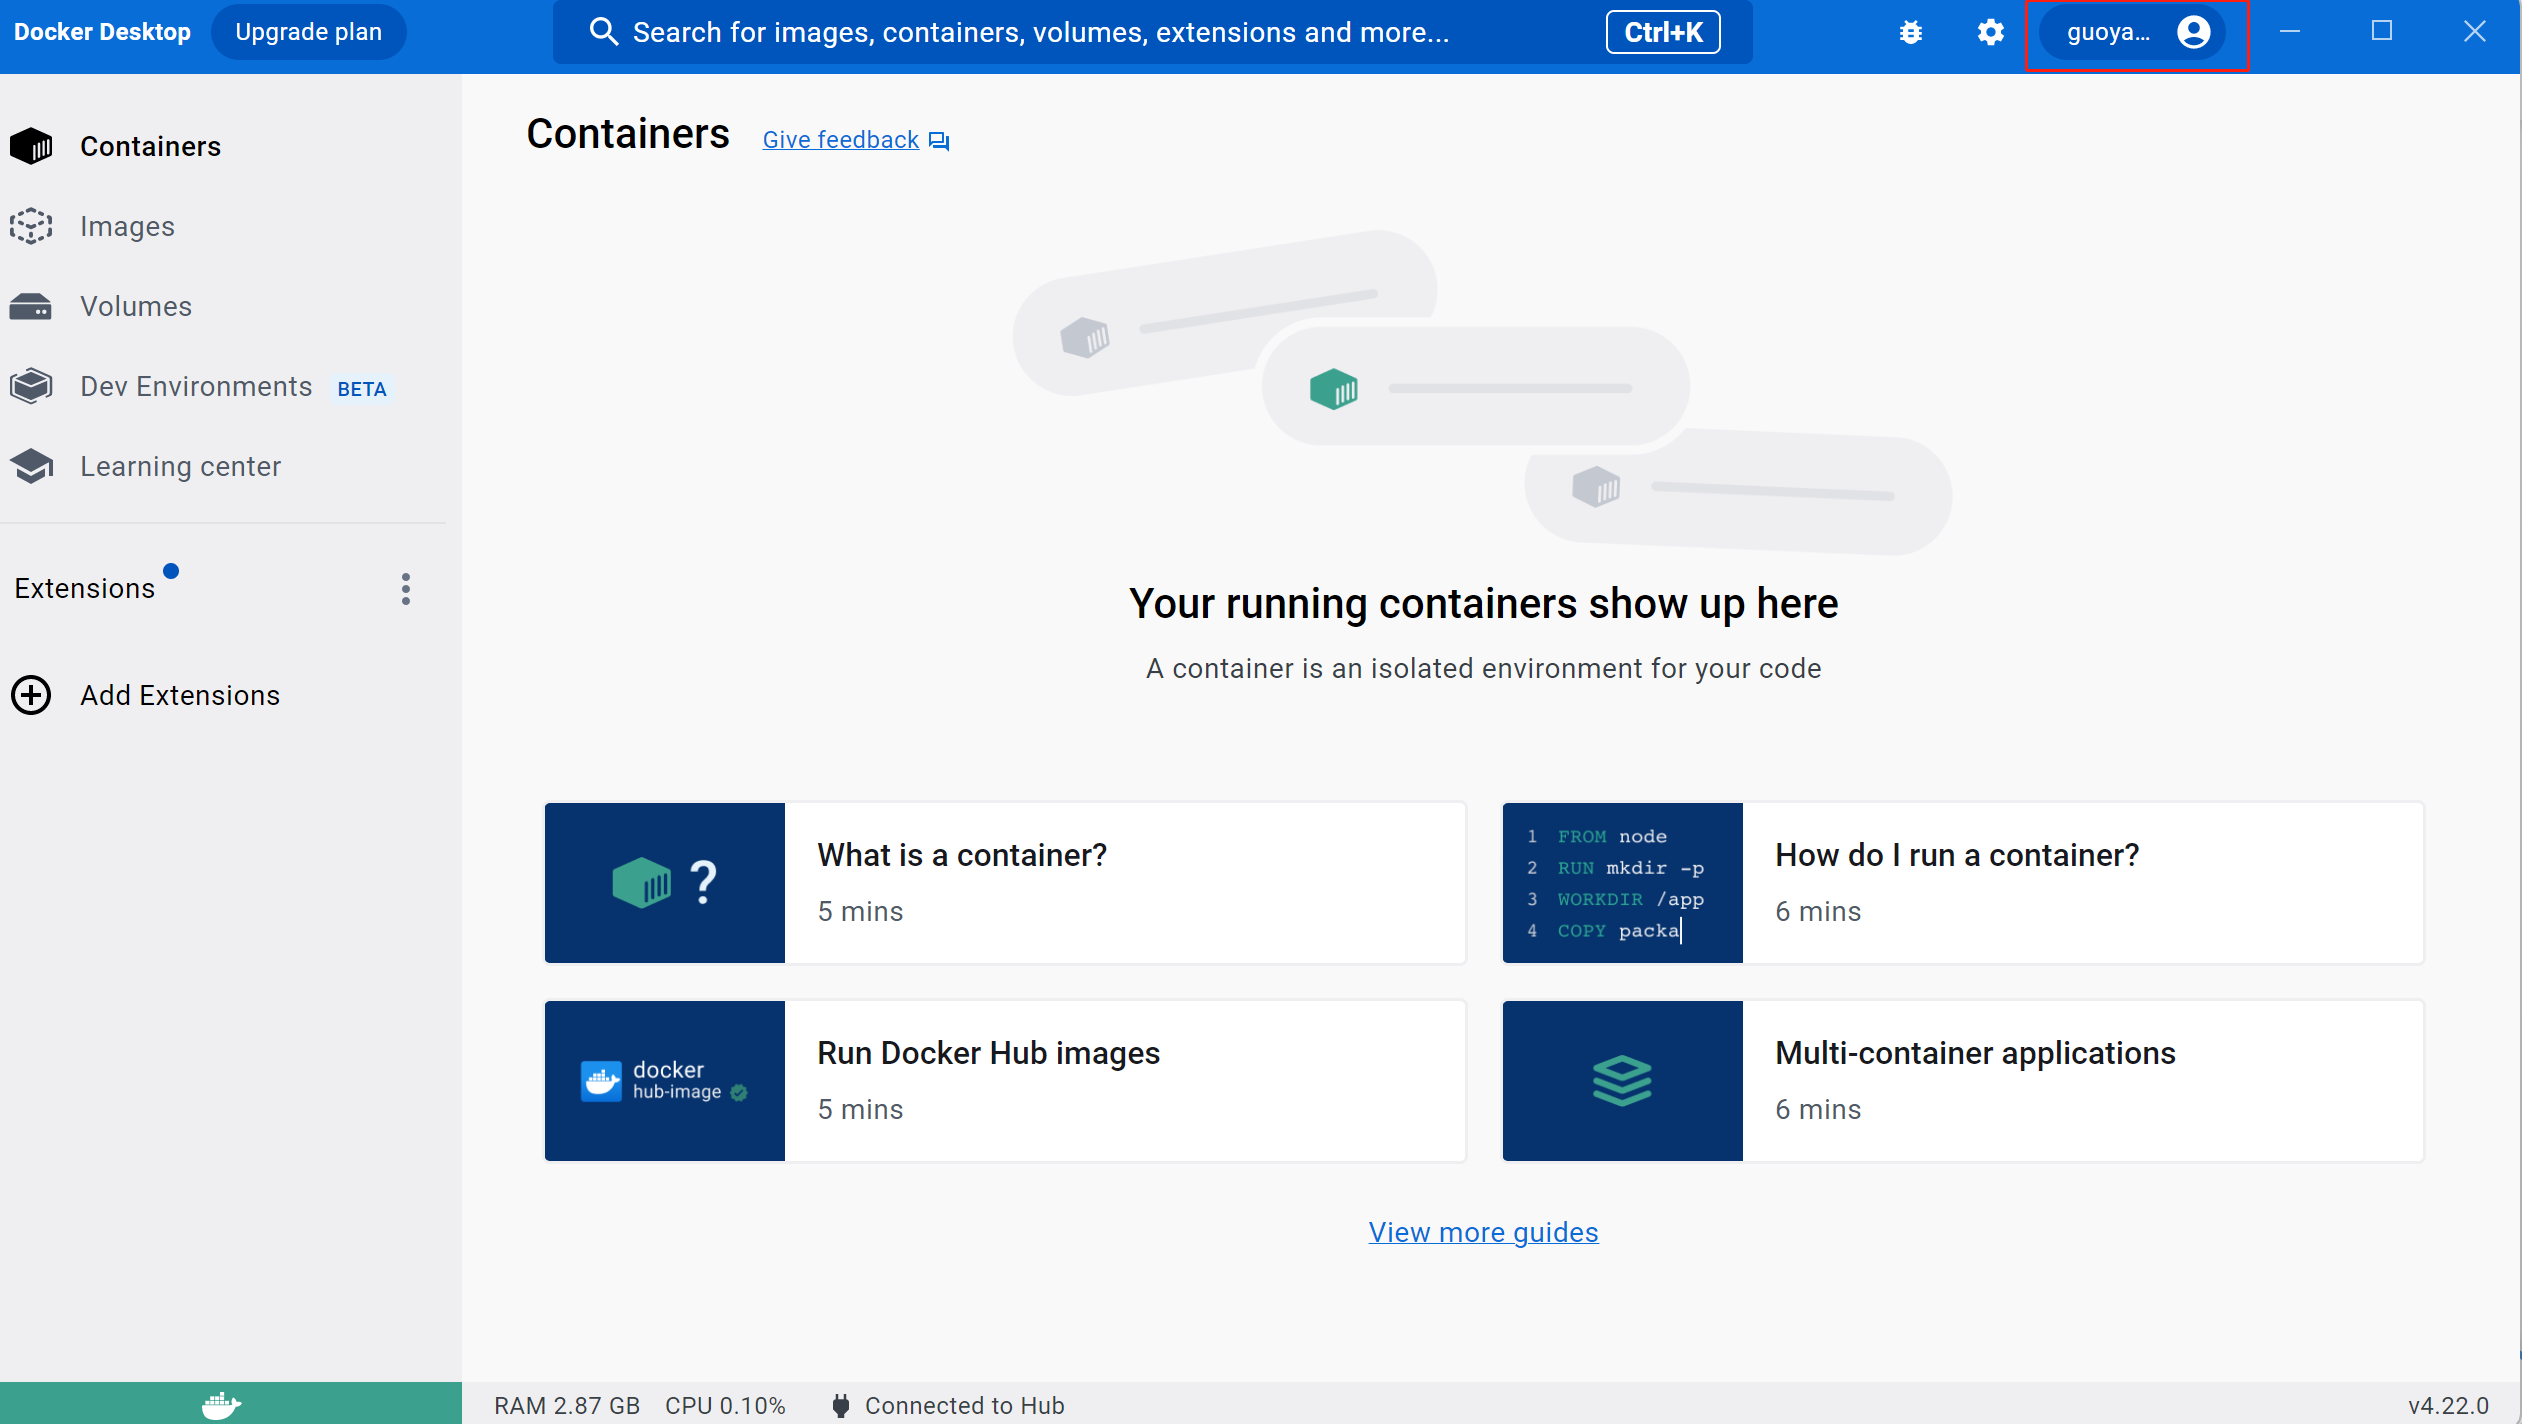
4、换源
我们打开Docker的设置 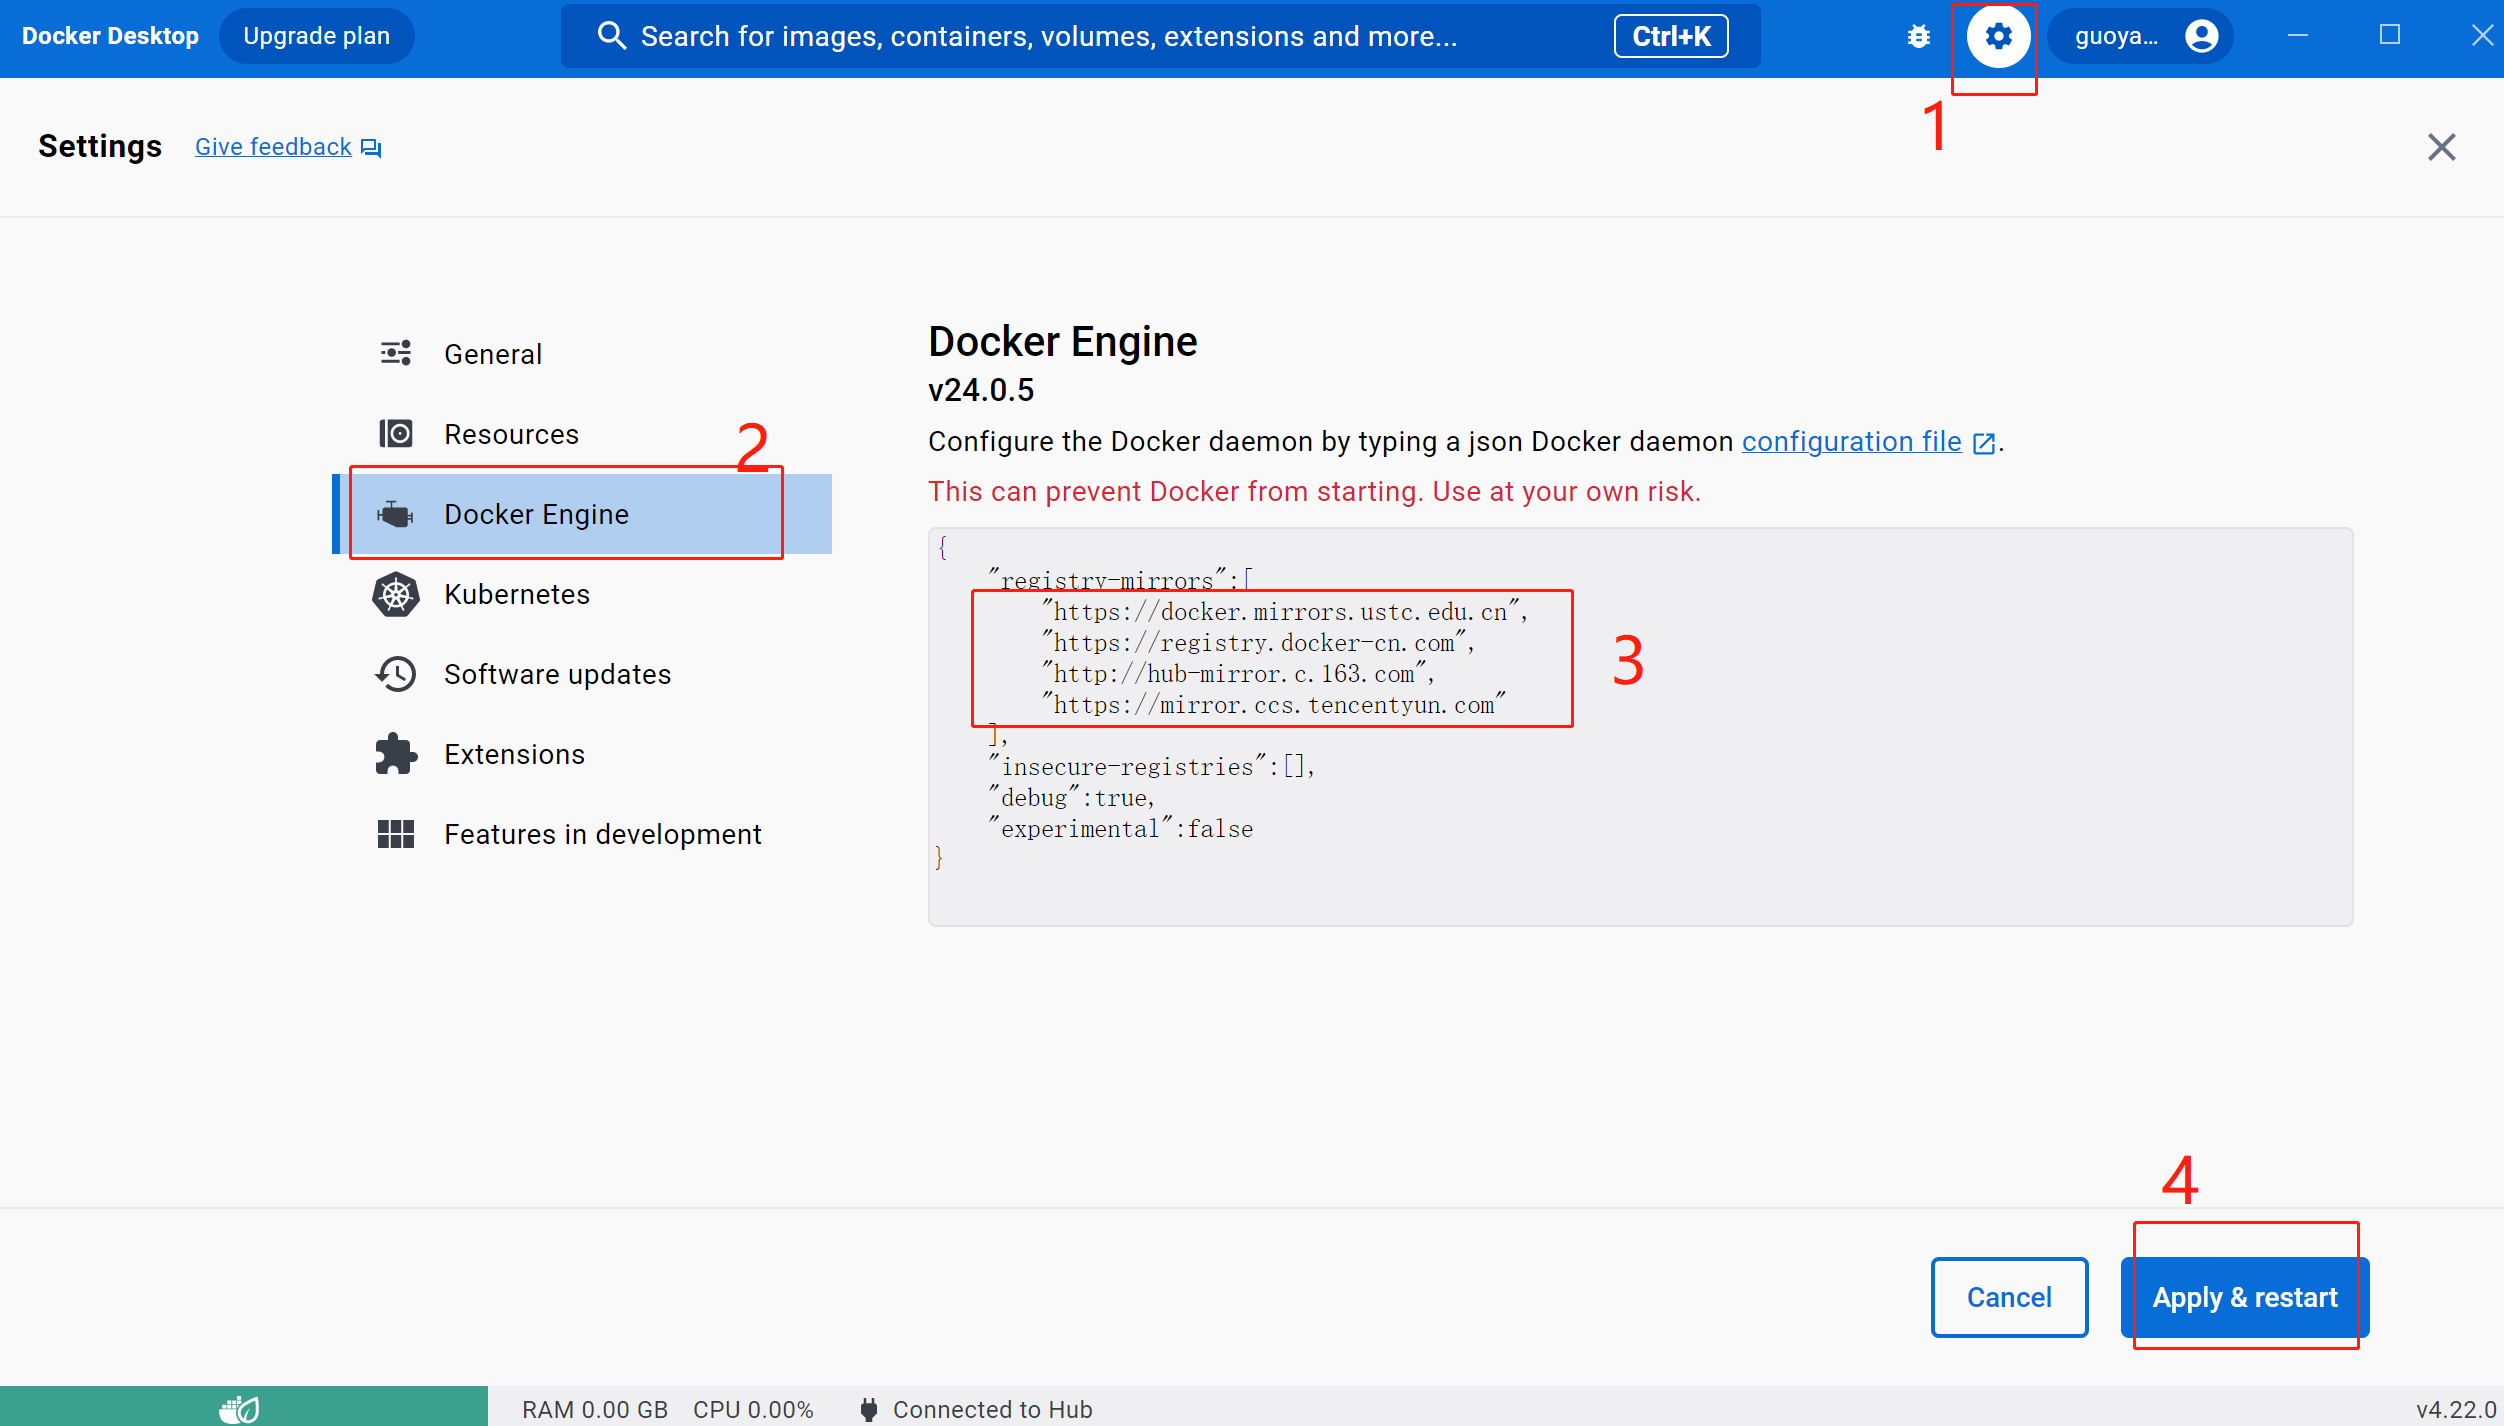
选择Docker Engine,在编辑框中输入(这里选取的是163的源,你也可以换成你觉得更快的其它源)
{
  "registry-mirrors":[
      "https://docker.mirrors.ustc.edu.cn",
      "https://registry.docker-cn.com",
      "http://hub-mirror.c.163.com",
      "https://mirror.ccs.tencentyun.com"
  ],
  "insecure-registries":[],
  "debug":true,
  "experimental":false
}
5、基础使用
安装完成Docker后,默认每次开机的时候都会自动启动,但我们也可以手动启动,关闭或者重启Docker:
# 启动docker
sudo service docker start
# 重启docker
sudo service docker restart
# 停止docker
sudo service docker stop
首先我们打开cmd命令框,输入“docker run hello-world”是否会出现下图所示的提示,如果出现报错,这环境配置可能出现了问题。
这行命令会让docker从官方仓库中拉去hello-world的镜像到本地,并且自动将其实例化成容器。
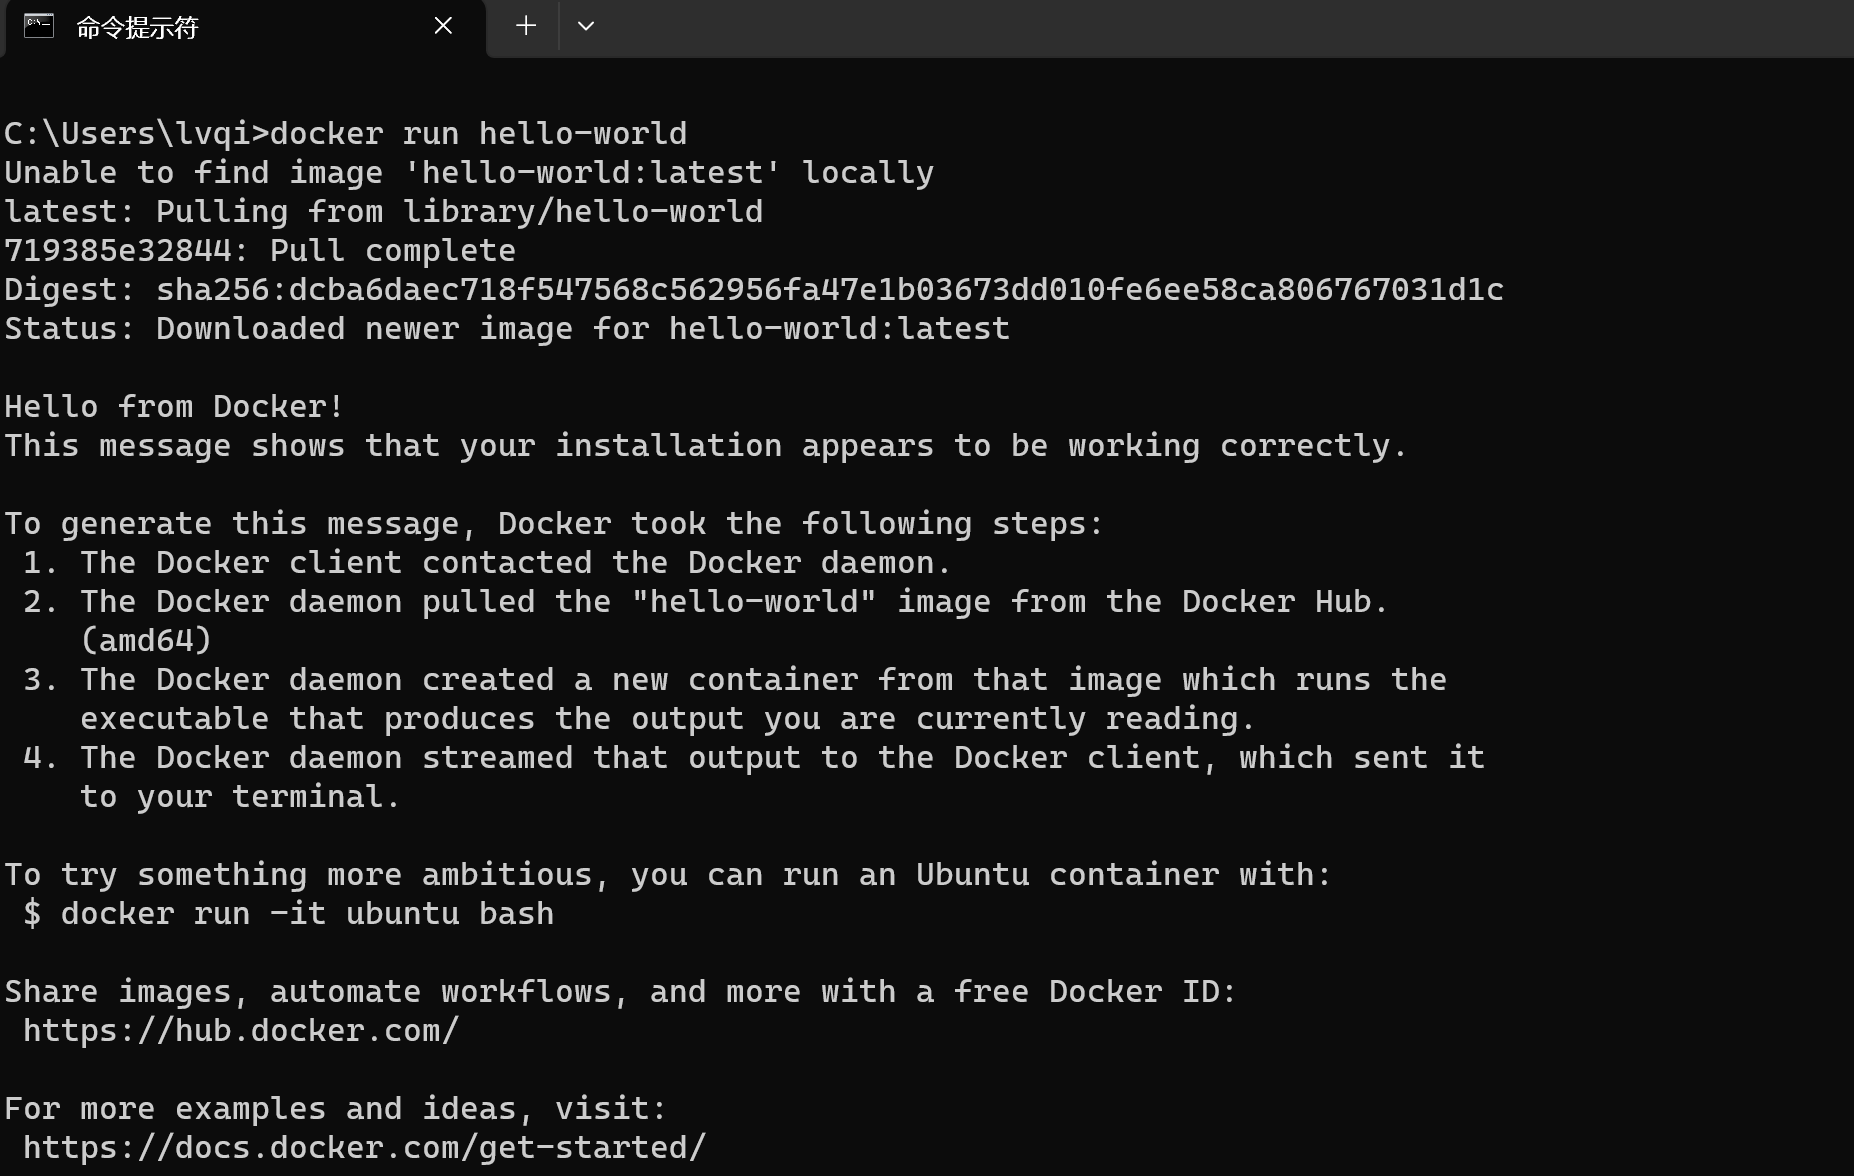
我们再去查看Docker Desktop的主页会出现如下记录 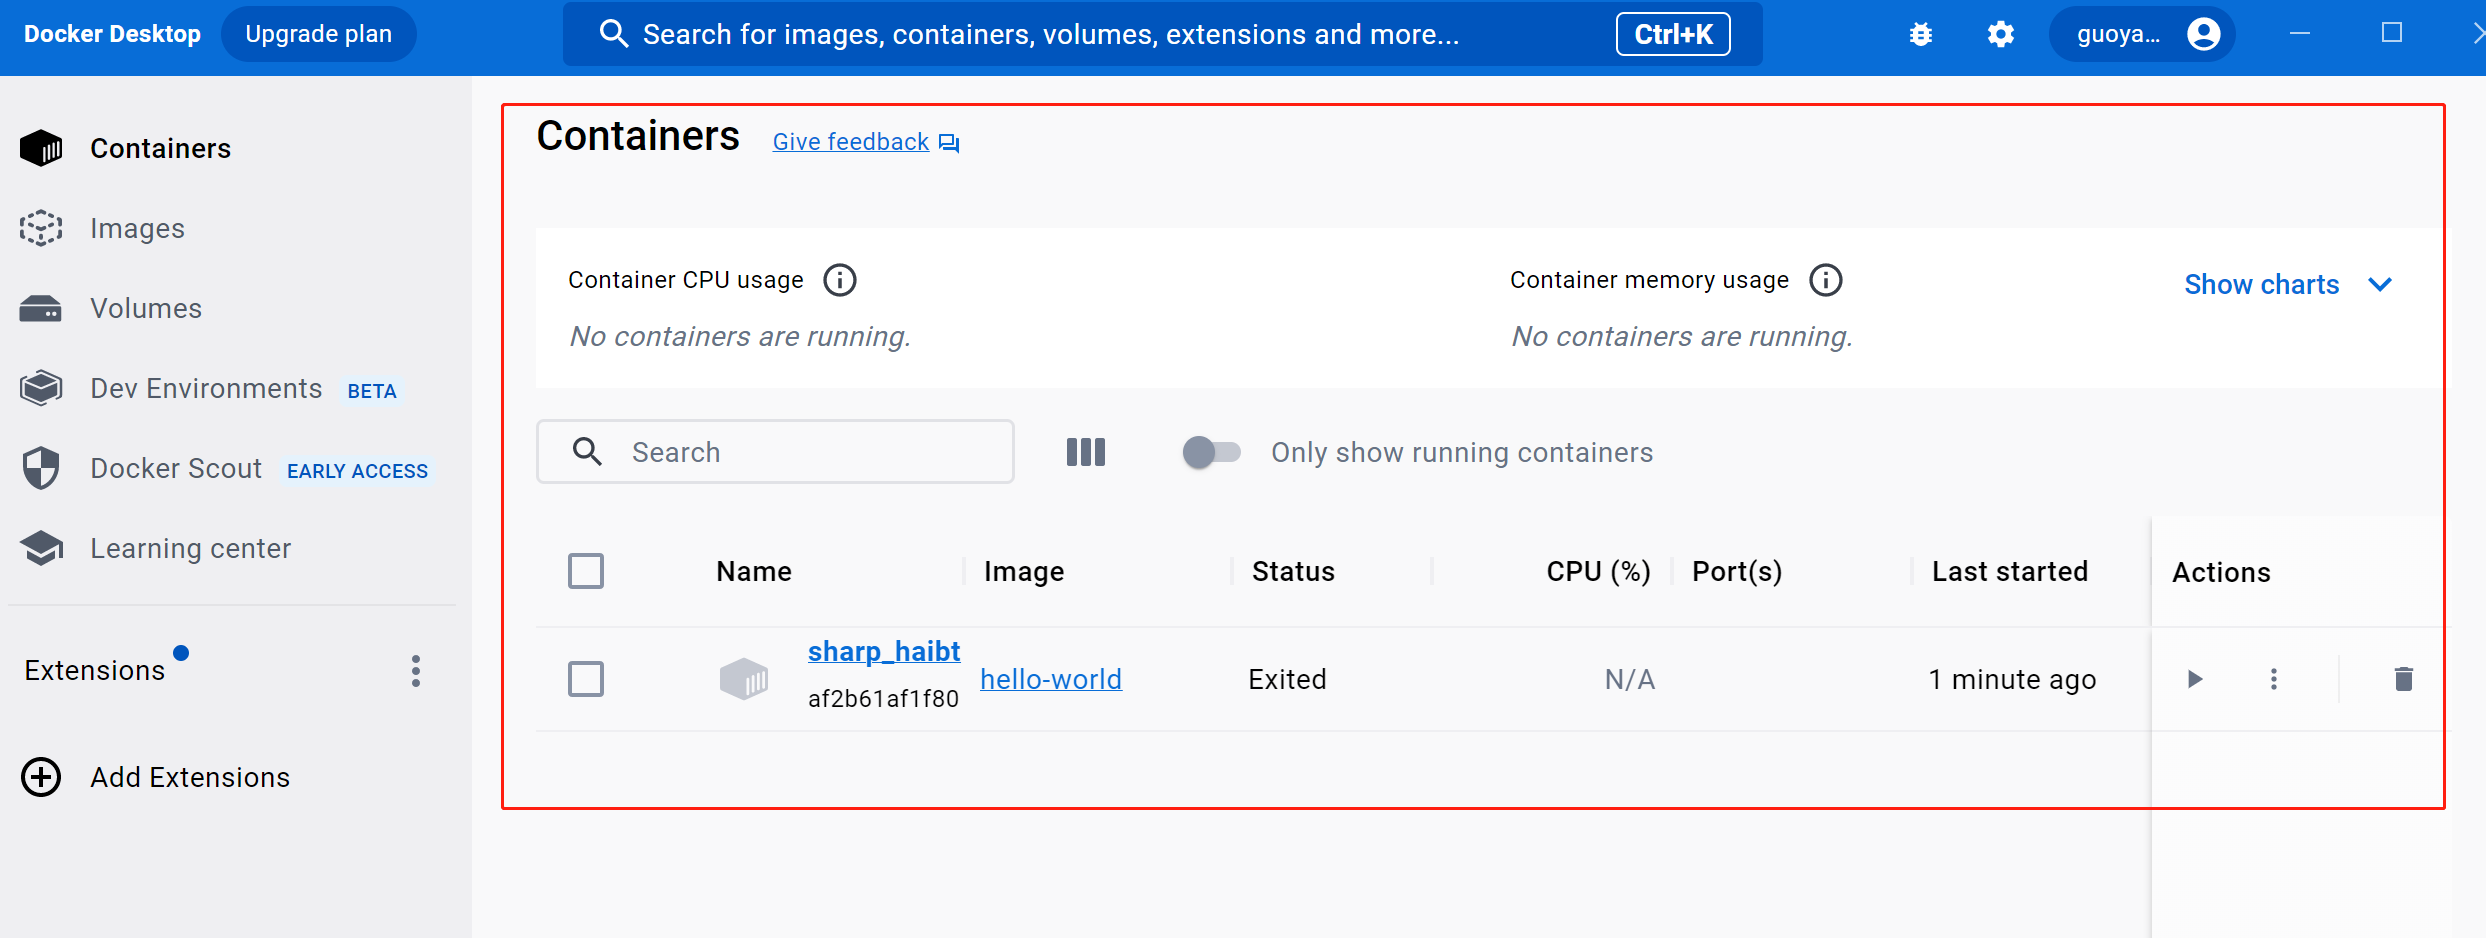
6、仪表盘简介
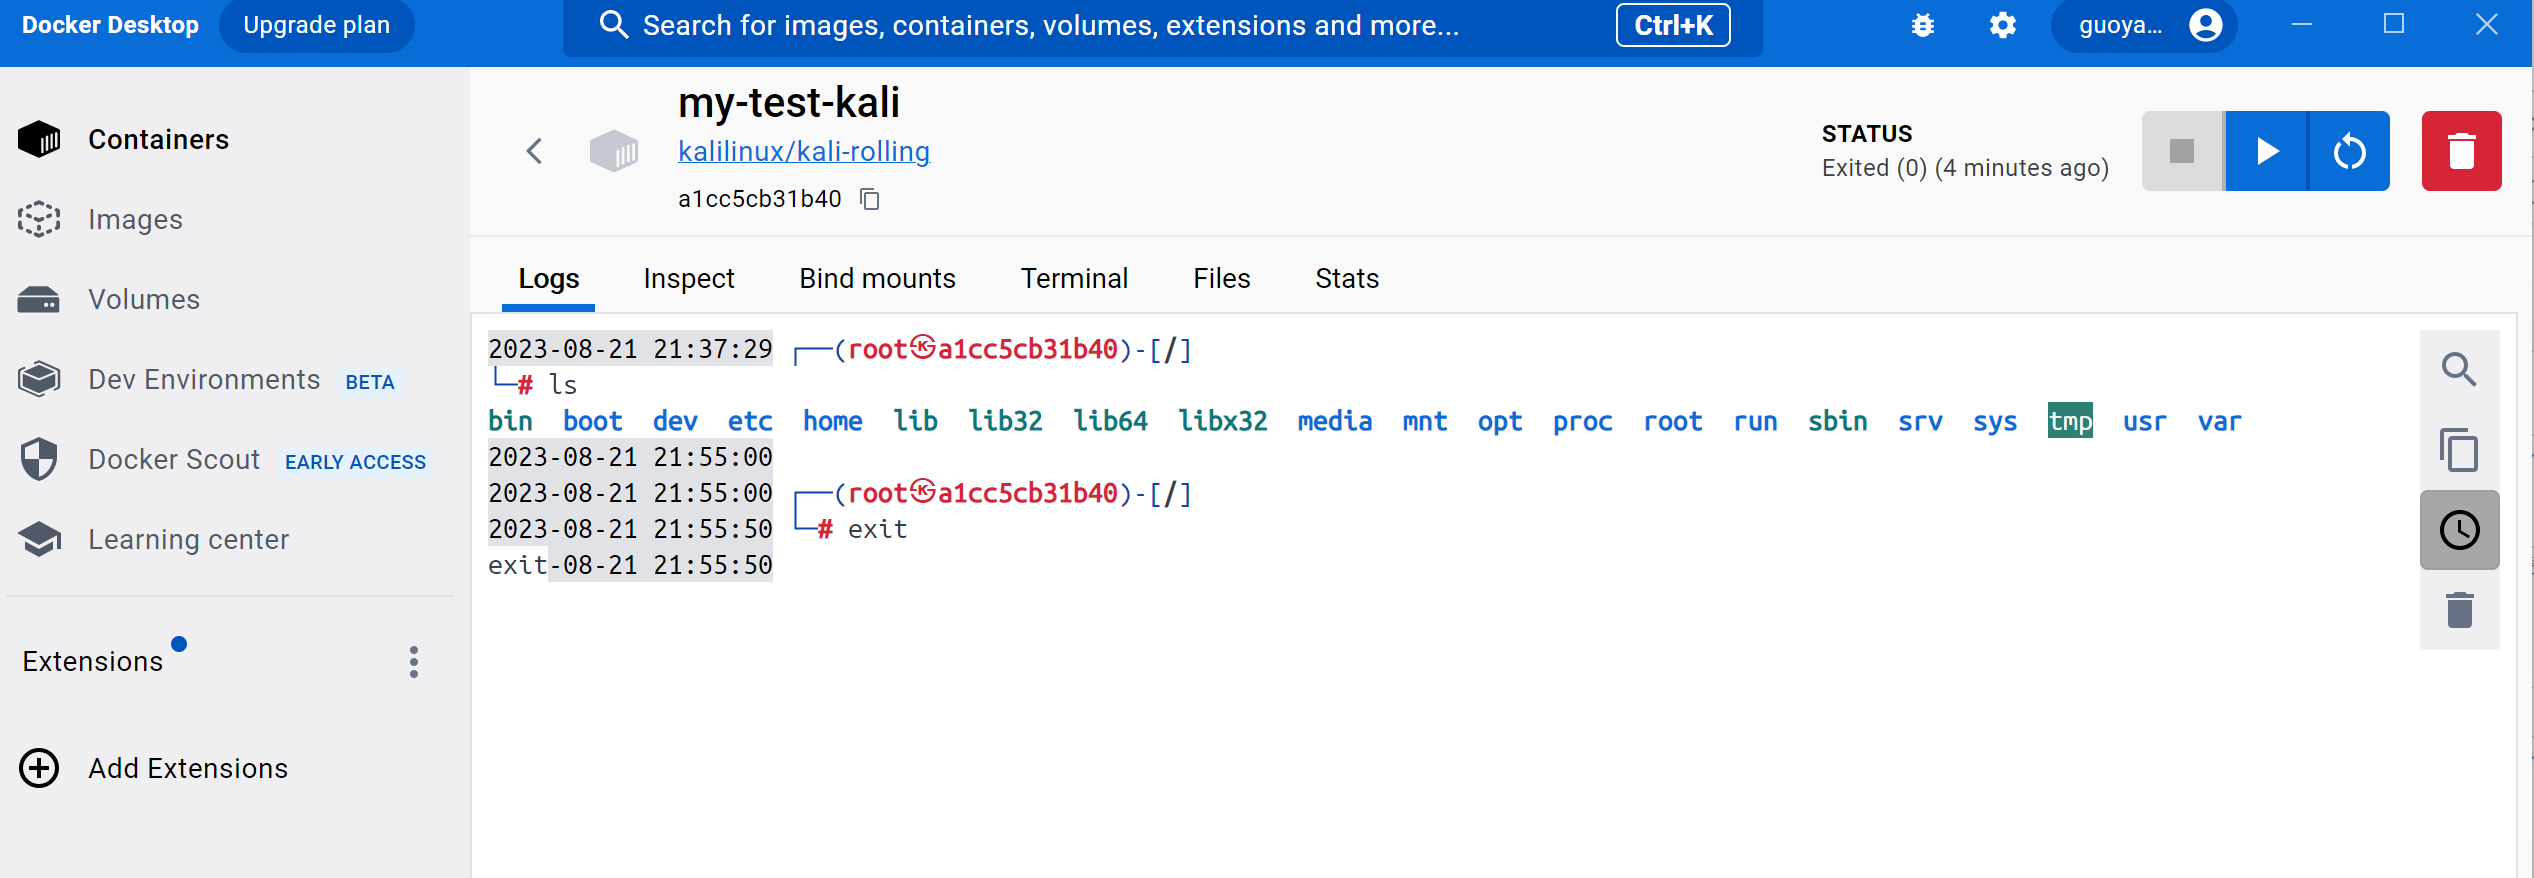
Docker 仪表板的主要作用为:快速访问容器日志,启动容器的 shell,并轻松管理容器生命周期(停止、删除等)。
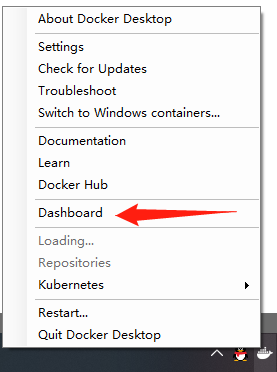
点击小鲸鱼图标后,选择Dashboard:
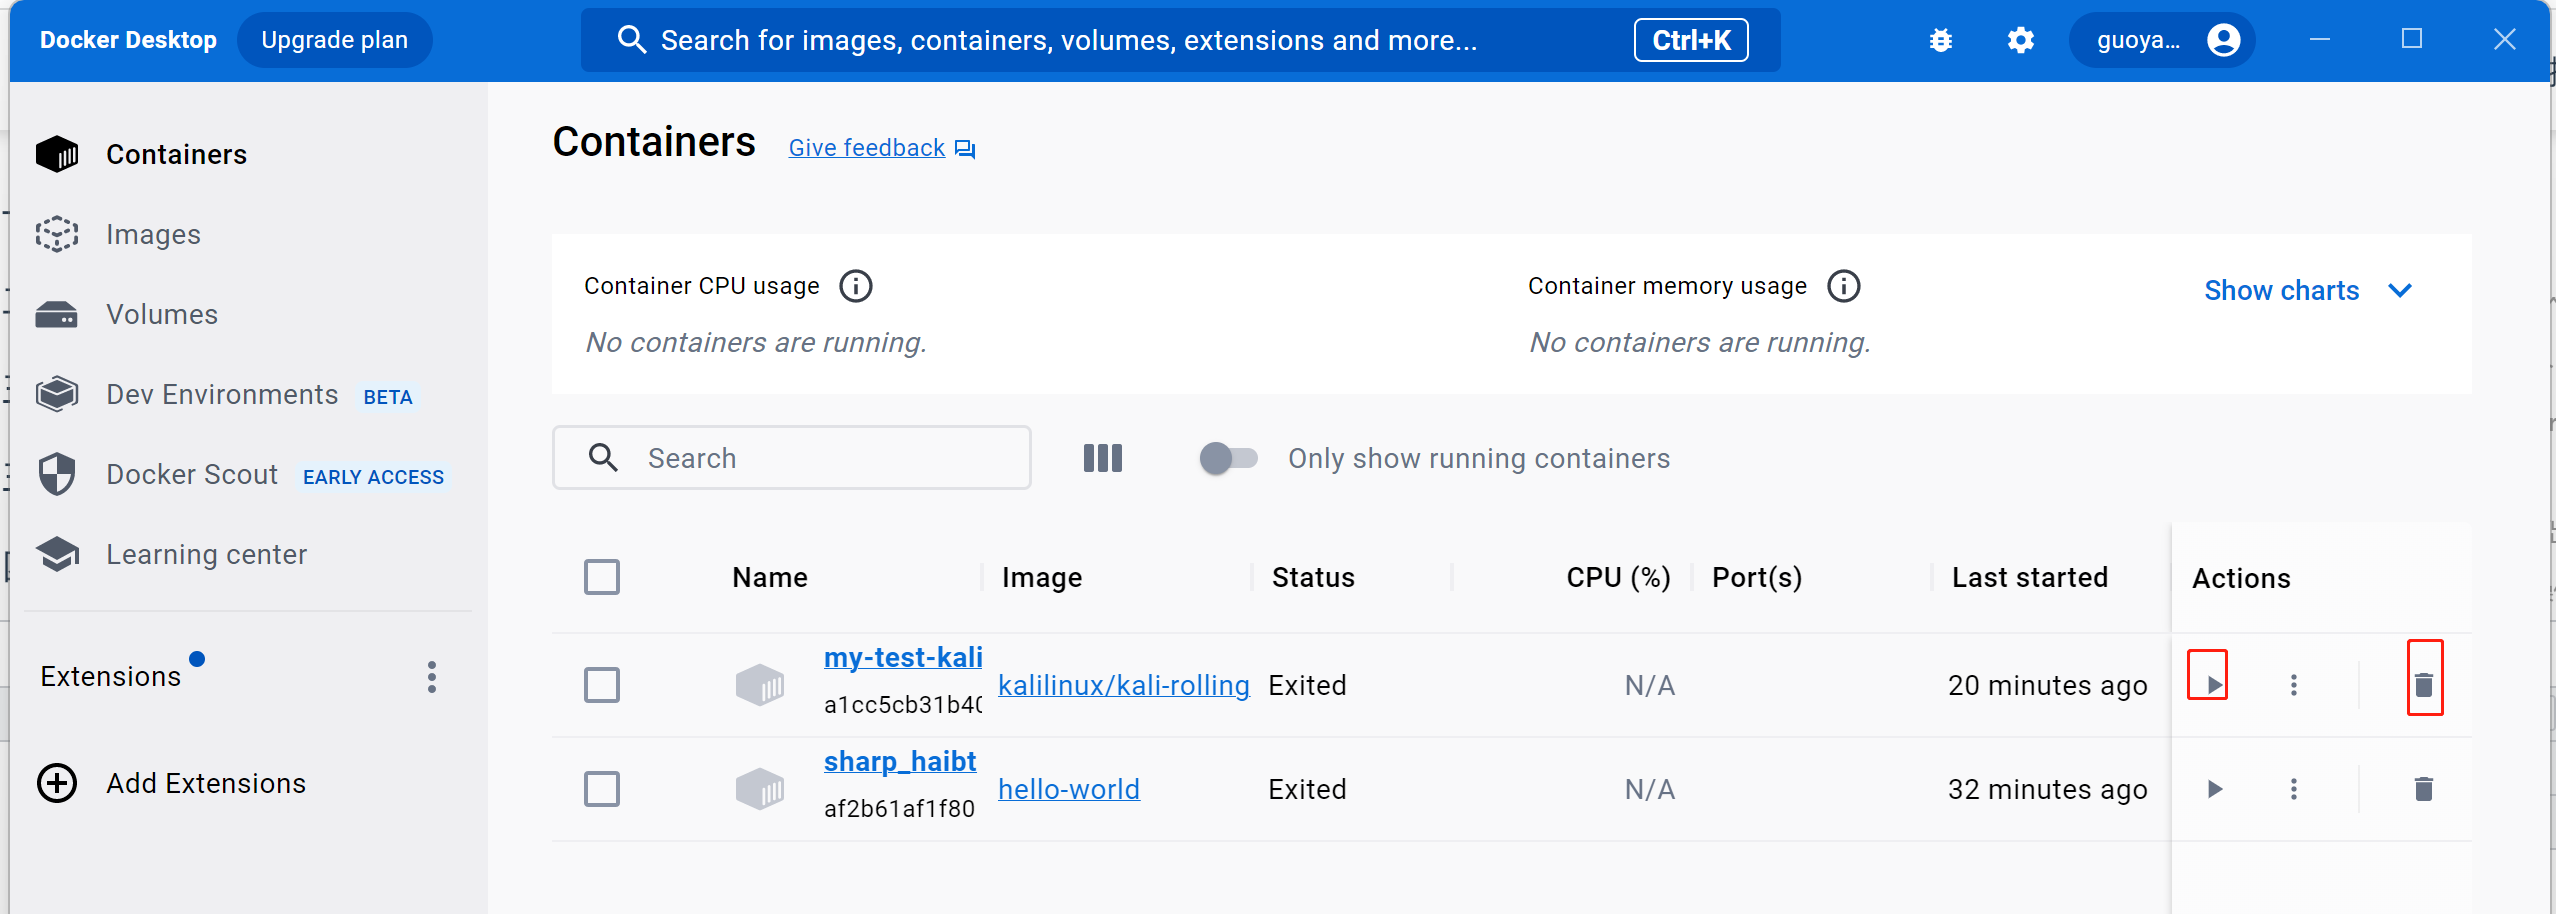
直接点击一个容器,我们可以进入容器的交互界面,其中能看到容器的log参数:
7、遇到的问题
- Docker Engine stopped...
昨天做了个数据库服务的demo,mysql是装在docker里面的。昨天用的好好的,用完也是先停的容器后关闭的docker,操作毫无问题。 今天早上就启动不了了!!!显示Docker Engine stopped...
https://www.cnblogs.com/zhaohongbing/p/16473057.html
四、Docker常用操作
1、docker启动/停止
#启动docker
systemctl start docker

#停止docker
systemctl stop docker

#重启docker
systemctl restart docker
2、查看docker服务状态
命令:
systemctl status docker示例:
[root@XXX ~]# systemctl status docker
● docker.service - Docker Application Container Engine
   Loaded: loaded (/usr/lib/systemd/system/docker.service; disabled; vendor preset: disabled)
   Active: active (running) since Fri 2023-11-17 22:51:05 CST; 2 days ago
     Docs: https://docs.docker.com
 Main PID: 32664 (dockerd)
    Tasks: 17
   Memory: 227.3M
   CGroup: /system.slice/docker.service
           ├─ 3660 /usr/bin/docker-proxy -proto tcp -host-ip 0.0.0.0 -host-port 8081 -container-ip 172.17....
           └─32664 /usr/bin/dockerd -H fd:// --containerd=/run/containerd/containerd.sock
3、查看docker服务进程
命令:
ps -ef|grep docker示例:
[root@XXX ~]# ps -ef|grep docker
root      3660 32664  0 Nov18 ?        00:00:00 /usr/bin/docker-proxy -proto tcp -host-ip 0.0.0.0 -host-port 8081 -container-ip 172.17.0.2 -container-port 8081
root     27990 27210  0 14:04 pts/1    00:00:00 grep --color=auto docker
root     32664     1  0 Nov17 ?        00:05:09 /usr/bin/dockerd -H fd:// --containerd=/run/containerd/containerd.sock
4、设置docker开机自启动
命令:
systemctl enable docker示例:
[root@xxx ~]# systemctl enable docker
Created symlink from /etc/systemd/system/multi-user.target.wants/docker.service to /usr/lib/systemd/system/docker.service.
5、设置容器开机自启动
#创建容器时,设置自动启动容器
docker run --restart=always 容器id(或者容器名称)

#如果创建时未指定--restart=always,可通过update 命令设置
docker update --restart=always  容器id(或者容器名称)
6、镜像命令
1)查看下载的镜像列表
命令:
docker image示例:
[root@XXX ~]# docker images
REPOSITORY               TAG       IMAGE ID       CREATED        SIZE
guoyading/hello-docker   latest    b4b07c3a1eed   47 hours ago   403MB
hello-world              latest    9c7a54a9a43c   6 months ago   13.3kB
上面图的结果字段含义如下:
| 标签 | 含义 |
|---|---|
| REPOSITORY | 镜像所在的仓库名称 |
| TAG | 镜像标签 |
| IMAGEID | 镜像ID |
| CREATED | 镜像的创建日期(不是获取该镜像的日期) |
| SIZE | 镜像大小 |
2)下载镜像
命令:
# 官方镜像
docker image pull 镜像名称
# 或简写为
docker pull 镜像名称
# 比如
docker pull ubuntu   //下载最新版本
docker pull ubuntu:16.04 //下载指定版本

# 个人镜像
docker pull 仓库名称/镜像名称
docker pull gyd/django

# 第三方仓库拉取
docker pull 第三方仓库地址/仓库名称/镜像名称
docker pull hub.c.163.com/library/mysql:latest
(默认仓库名为library,所有从官方获取镜像相当于`sudo docker image pull library/镜像名称`)
除了使用官方的镜像外,我们还可以在仓库中申请一个自己的账号,保存自己制作的镜像,或者拉取使用他人的镜像。
3)删除镜像
命令:
docker image rm 镜像名或镜像ID 或 docker rmi 镜像名或镜像ID
docker image rm hello-world
docker rmi 9e64176cd8a2

//强制删除(增加-f参数)
docker rm -f hello-world
docker rmi -f hello-world
示例:
[root@XXX ~]# docker rmi hello-world
Error response from daemon: conflict: unable to remove repository reference "hello-world" (must force) - container 791af05cd76d is using its referenced image 9c7a54a9a43c
[root@iZbp128dczen7roibd3xciZ ~]# docker rmi -f hello-world
Untagged: hello-world:latest
Untagged: hello-world@sha256:c79d06dfdfd3d3eb04cafd0dc2bacab0992ebc243e083cabe208bac4dd7759e0
Deleted: sha256:9c7a54a9a43cca047013b82af109fe963fde787f63f9e016fdc3384500c2823d
删除镜像的前提是没有使用这个镜像的容器,如果有需要先删除容器, 我们可以增加-f参数执行强制删除。
4)加载镜像
镜像只是一个只读类型的文件,而我们的环境不可能只是一个这样的文件,所以我们需要把这个镜像加载成我们的环境,也就是让他变成容器
docker run [可选参数] 镜像名 [向启动容器中传入的命令]| 常用可选参数 | 作用 |
|---|---|
| -i | 表示以《交互模式》运行容器。 |
| -d | 会创建一个守护式容器在后台运行(这样创建容器后不会自动登录容器)。 |
| -t | 表示容器启动后会进入其命令行。加入这两个参数后,容器创建就能登录进去。即分配一个伪终端。 |
| –name | 为创建的容器命名。(默认会随机给名字,不支持中文字符!!!) |
| -v | 表示目录映射关系,即宿主机目录:容器中目录。注意:最好做目录映射,在宿主机上做修改,然后共享到容器上。 |
| -p | 表示端口映射,即宿主机端口:容器中端口。 比如:-p 8080:80 就是将容器中的80端口,映射到主机中的8080端口 |
| –network=host | 表示将主机的网络环境映射到容器中,使容器的网络与主机相同。每个 Docker 容器都有自己的网络连接空间连接到虚拟 LAN。使用此命令则会让容器和主机共享一个网络空间。 |
可以启动一个系统docker run -i -d -t --name=my-test-kali kalilinux/kali-rolling(这里我使用linux的一个发行版作为介绍) 或可以简写为docker run -idt --name=my-test-kali kalilinux/kali-rolling
如果加载一个我们没有的镜像,docker会自动从配置好的远程官方仓库中进行拉取。

或者我们可以启动一个网站docker run -dp 8080:80 --name docker-test docker/getting-started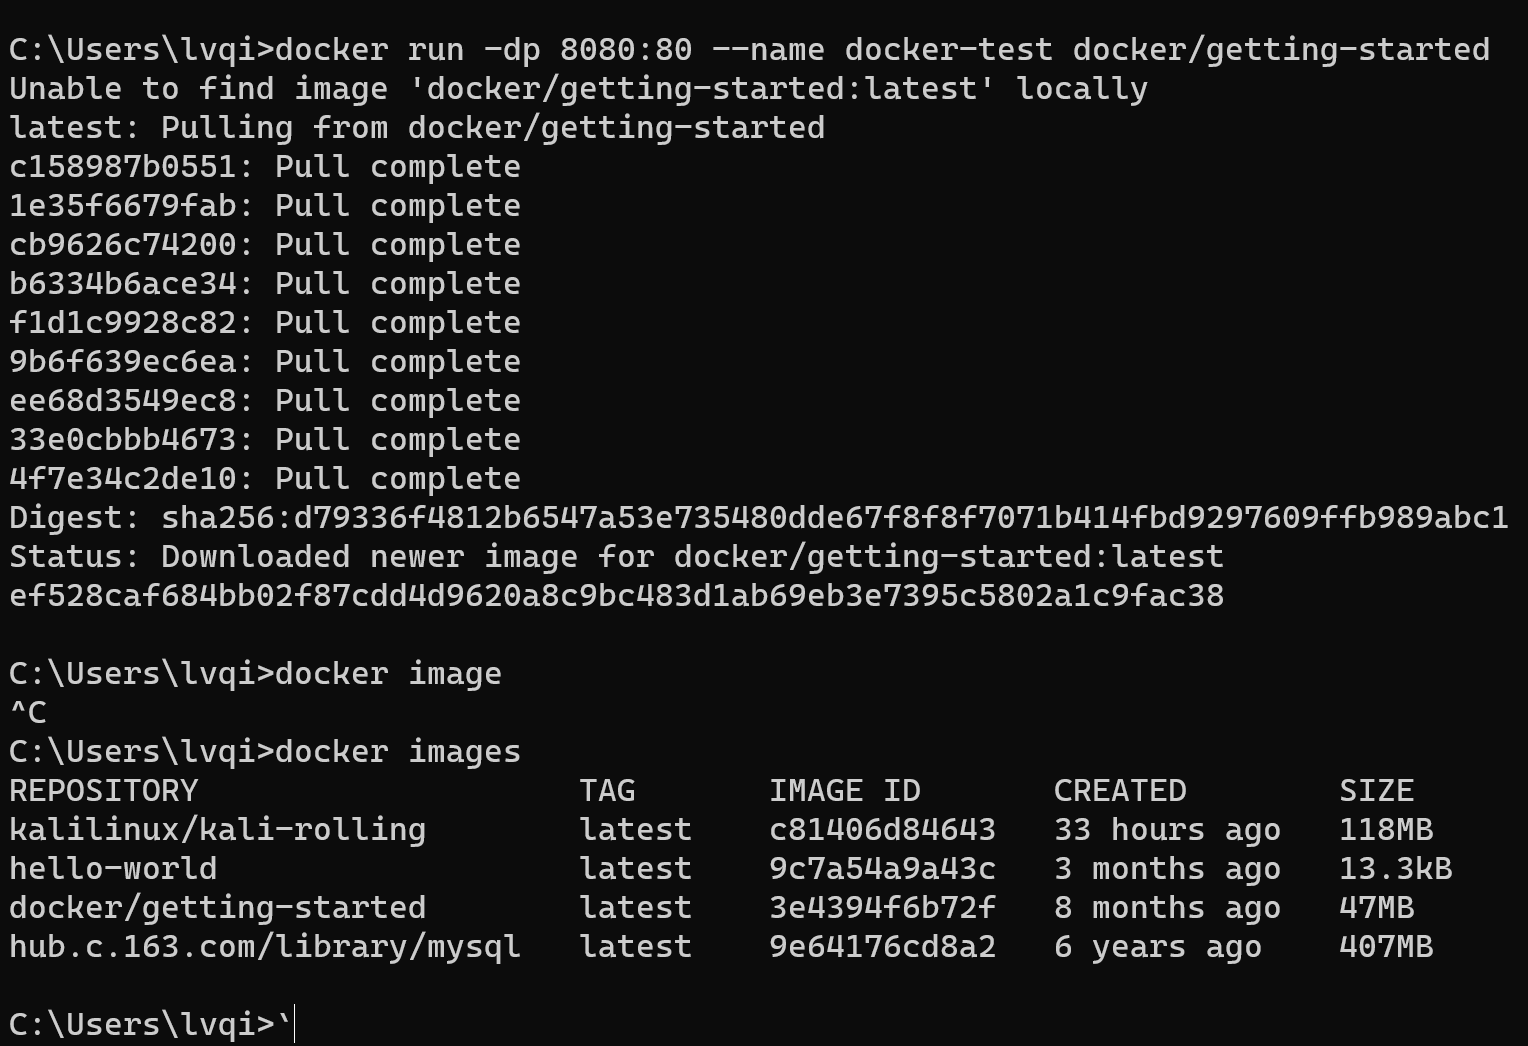
如果你没有下载docker/getting-started的镜像,这里会自动帮你下载。 成功启动后,可以在浏览器中输入“http://localhost:8080/” 即可看到如下页面 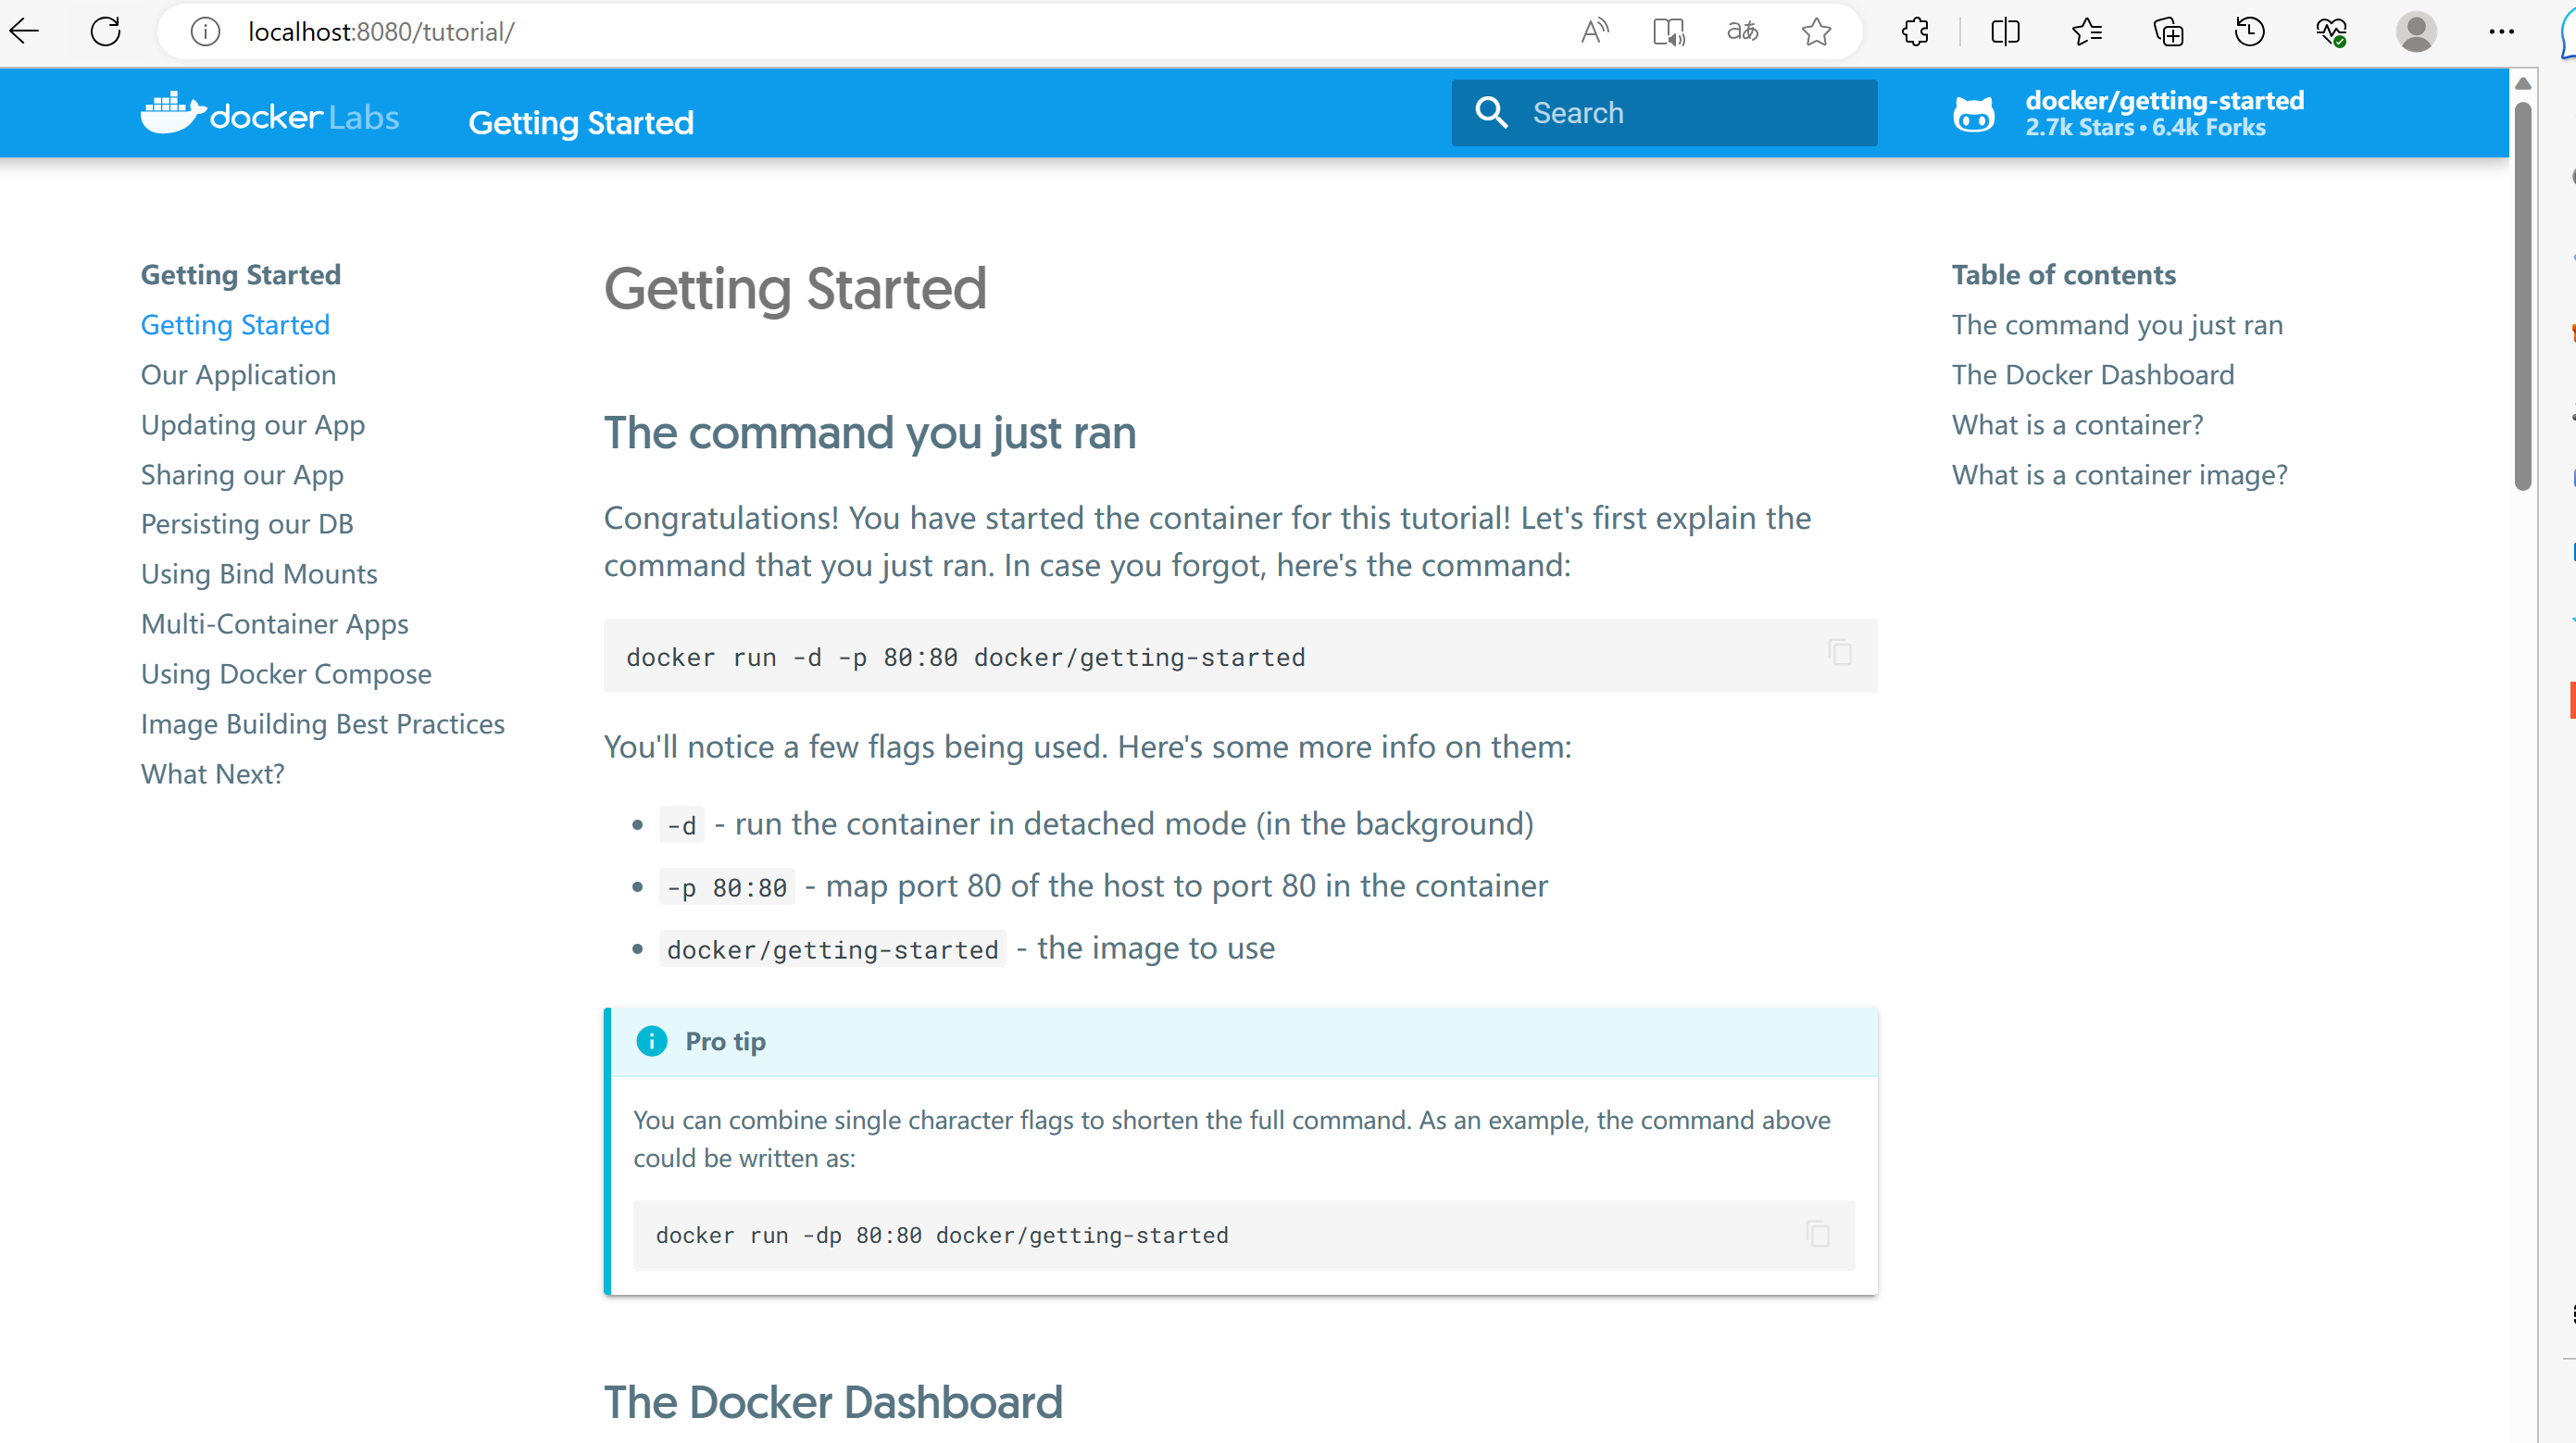
上面我们成功将镜像变成了容器,但上述的命令中我们都加入了-d,让容器在后台运行了,后面会介绍如何和正在运行的容器进行交互。
5)搜索镜像
命令:
docker search 镜像名示例:
从远程镜像仓库搜索java镜像
[root@iZbp128dczen7roibd3xciZ ~]# docker search java
NAME                               DESCRIPTION                                     STARS     OFFICIAL
node                               Node.js is a JavaScript-based platform for s…   13062     [OK]
tomcat                             Apache Tomcat is an open source implementati…   3603      [OK]
ghost                              Ghost is a free and open source blogging pla…   1671      [OK]
couchdb                            CouchDB is a database that uses JSON for doc…   544       [OK]
java                               DEPRECATED; use "openjdk" (or other JDK impl…   1998      [OK]
groovy                             Apache Groovy is a multi-faceted language fo…   145       [OK]
amazoncorretto                     Corretto is a no-cost, production-ready dist…   352       [OK]
jetty                              Jetty provides a Web server and javax.servle…   404       [OK]
tomee                              Apache TomEE is an all-Apache Java EE certif…   113       [OK]
ibmjava                            Official IBM® SDK, Java™ Technology Edition …   124       [OK]
appdynamics/java-agent             Java Agent for Kubernetes                       13
bitnami/java                       Bitnami Java Docker Image                       26
airbyte/java-datadog-tracer-base   Docker image that provides the DataDog Java …   0
javanile/vtiger                    Vtiger CRM is open source software that help…   15
kasmweb/java-dev                   Ubuntu Java development desktop for Kasm Wor…   3
circleci/java                      This image is for internal use                  2
circleci/java-nginx                Java+nginx image. This image is for internal…   1
javanile/adminer                   Build adminer                                   1
javanile/novnc                     Ready to use NoVNC client for SeleniumHQ on …   3
javanile/vtiger-dev                Ready for development vtiger docker image       1
javanile/bash-ci                                                                   0
javanile/xdebug                                                                    0
javanile/make.bat                                                                  0
javanile/pwd                                                                       0
javanile/mysql                     MySQL for development                           0
7、容器命令
1)查看容器
查看容器主要会用到ps命令:
# 查看当前所有正在运行的容器
docker ps
# 查看当前所有的容器
docker ps -a
# 使用过滤器(除了name外,常用的还可以指定id:id= 、所有停止的容器:status=exited,正在运行的容器:status=running 等)
docker ps -f name=指定的名字
# 显示2个上次创建的容器(2可以改变)
docker ps -n 2
# 显示最新创建的容器(包括所有状态)
docker ps -l
# 仅显示ip
docker ps -q
 # 显示容器大小
docker ps -s
示例:

上面的参数列含义如下:
| 标签 | 含义 |
|---|---|
| CONTAINER ID | 镜像ID |
| IMAGE | 创建容器的镜像名称 |
| COMMAND | 默认启动命令(启动时会自动执行) |
| CREATED | 创建容器的日期 |
| STATUS | 当前的状态(启动了多久,多久之前退出等) |
| PORTS | 映射的端口 |
| NAMES | 容器的名称 |
| SIZE | 容器大小(使用-s命令参数时才能看到) |
2)启动容器
命令:
# 启动容器
docker container start 容器名或容器id
# 或可简写为
docker start 容器名或容器id
示例:
[root@XXX ~]# docker container start 29d9a8c3ba4a
29d9a8c3ba4a
3)停止容器
命令:
# 停止某个容器
docker container stop 容器名或容器id
# 或可简写为
docker stop 容器名或容器id


# 强制停止某个容器
docker container kill 容器名或容器id
# 或可简写为
docker kill 容器名或容器id
示例:
[root@XXX ~]# docker container stop 29d9a8c3ba4a
29d9a8c3ba4a
如果我们成功启动或者关闭一个容器的话,会返回容器名或者容器id
stop和kill的区别: stop是比较优雅的关掉一个容器,类似我们正常退出一个软件,而kill是当一个进程出现意外无法正常关闭的时候,我们强行进行关闭,有点像我们使用任务管理器进行结束进程操作。
4)容器内交互
之前我们下过一个kali并且放在了后台运行,如果没有下载可以执行下载命令docker run -i -d -t --name=my-test-kali kalilinux/kali-rolling,接下来我们就用下面的命令开启kali(如果你下的是其他系统,比如ubuntu也可以举一反三一下)。
首先我们确保我们要进入的容器是开启状态的,使用docker ps -a查看其中的STATUS属性是否是Up开头,如果不是先照着上面启动容器的方法开启容器。
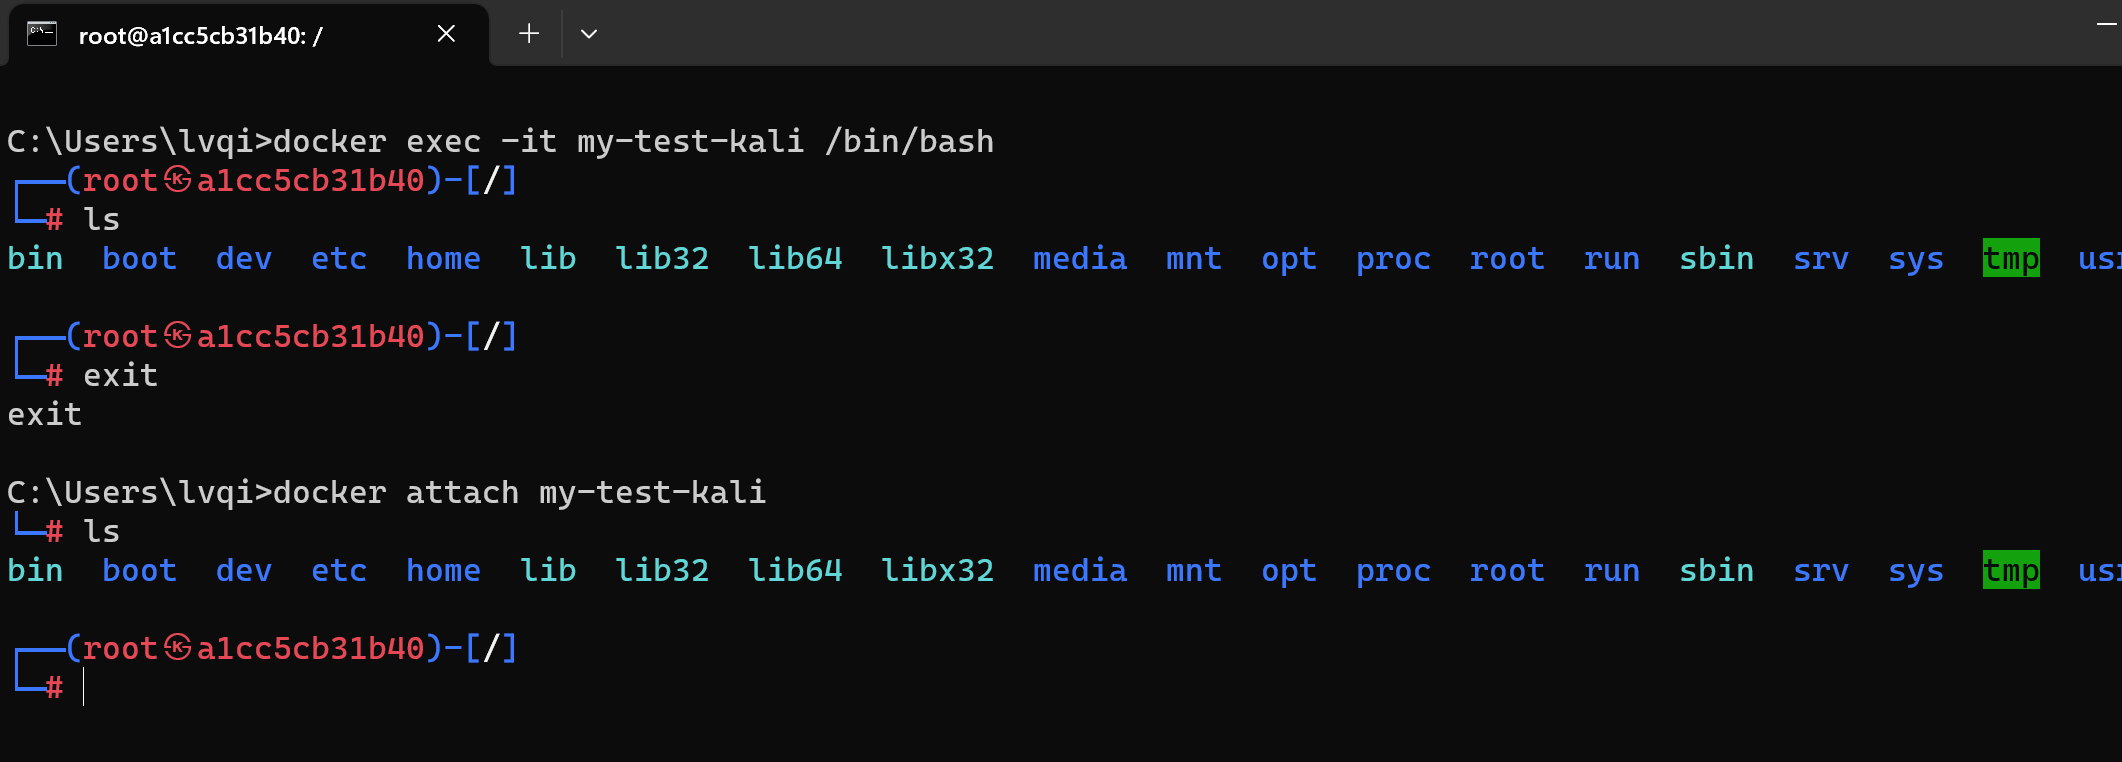
我们开启容器后,如果需要在容器内执行命令,可以将后台切换到前台,也可能使用docker命令将我们需要执行的命令传入。
操作方法有很多种,这里我们介绍一些比较常用的方法 :
# 如果我只需要执行简单的一两条命令可以使用docker exec
# 执行单条命令 (-i: 启动并且保留交互式命令行; -t:作用是分配一个虚拟的终端; docker run )
docker exec -it 容器名或容器id 执行的命令
# 比如
docker exec -it my-test-kali whoami
# 用这种方法,我们还可以启动命令行,根据Linux的特性,系统程序会在/bin中,linux中常用的Shell有多个,其中大部分用的Linux默认的为bash
# 所以我们启动命令可以执行如下命令(除了/bin/bash外,linux一般还会带/bin/sh、/bin/rbash、/bin/dash等,具体区别可以自行百度)
docker exec -it 容器名或容器id /bin/bash
# 比如
docker exec -it my-test-kali /bin/bash
# 除了exec外还有attach可以使用,但它有个弊端,多终端启动attach后,都会会同步显示。如果有一个窗口阻塞了,那么其他窗口也无法再进行操作。
docker attach 容器名或容器id
# 比如
docker attach my-test-kali| exec可选参数 | 作用 |
|---|---|
| -d | 会创建一个守护式容器在后台运行(这样创建容器后不会自动登录容器)。 |
| -e | 设置环境变量 |
| -i | 表示以《交互模式》运行容器。 |
| -t | 表示容器启动后会进入其命令行。加入这两个参数后,容器创建就能登录进去。即分配一个伪终端。 |
| -u | 设置用户名和UID。 |
| -w | 设置容器内的工作目录。 |
除了上述方法外,在进入容器后,我们还可以尝试安装SSH或者nsenter尝试登陆,不过这两种方法都先进入容器安装后才能使用 但并不建议在 Docker 容器中运行 ssh
# nsenter安装步骤
wget https://www.kernel.org/pub/linux/utils/util-linux/v2.24/util-linux-2.24.tar.gz
tar -xzvf util-linux-2.24.tar.gz
cd util-linux-2.24/
./configure --without-ncurses
make nsenter
sudo cp nsenter /usr/local/bin
5)删除容器
如我我们需要删除一个容器,首先需要确保这个容器已经停止了,因为正在运行的容器是无法直接删除(可以强制删除)。 我们可以运行一下docker ps -a,如果发现没有停止,可以使用docker stop停止(STATUS下已Exited开头则是停止的) 
# 使用rm删除容器
docker rm 容器名或容器id
# 列如
docker rm docker-test
如果报错Error response from daemon: You cannot remove a running container 容器ID. Stop the container before attempting removal or force remove则代表这个容器已经启动,需要执行 docker stop 容器id,停止此容器。
8、容器制作成镜像
我们为什么要把容器制作成镜像?
保存新镜像,这样每次修改完 数据都还在,可理解为Linux的快照 docker commit 容器id 镜像名 比如:docker commit es48s4ds5se mysql0812
- 镜像可以看作为是一种快照备份,如果我们后期环境出现了问题,可以还原到早期镜像。
- 镜像便于传播,可以让自己的其他设备或他人的重复利用变得更加简单容易。
# 将容器制作成镜像
docker commit 容器名 镜像名
# 镜像打包备份(打包备份的文件会自动存放在当前命令行的路径下,如果想让保存的文件可以打开,可以加.tar后缀)
docker save -o 保存的文件名 镜像名
# 镜像解压
docker load -i 文件路径/备份文件
我们将打包备份的镜像可以通过网络发送到其他设备上,使用docker镜像解压即可直接使用你的环境。
9、查看docker版本
命令:
docker version (或者输入 docker -v 或者 docker --version)示例:
[root@xxx ~]# docker version
Client: Docker Engine - Community
 Version:           25.0.0-beta.1
 API version:       1.44
 Go version:        go1.21.3
 Git commit:        2b521e4
 Built:             Mon Nov 13 16:53:06 2023
 OS/Arch:           linux/amd64
 Context:           default

Server: Docker Engine - Community
 Engine:
  Version:          25.0.0-beta.1
  API version:      1.44 (minimum version 1.12)
  Go version:       go1.21.3
  Git commit:       6af7d6e
  Built:            Mon Nov 13 16:52:03 2023
  OS/Arch:          linux/amd64
  Experimental:     false
 containerd:
  Version:          1.6.24
  GitCommit:        61f9fd88f79f081d64d6fa3bb1a0dc71ec870523
 runc:
  Version:          1.1.9
  GitCommit:        v1.1.9-0-gccaecfc
 docker-init:
  Version:          0.19.0
  GitCommit:        de40ad0
10、docker系统信息
命令:
docker info示例:
[root@XXX ~]# docker info
Client: Docker Engine - Community
 Version:    25.0.0-beta.1
 Context:    default
 Debug Mode: false
 Plugins:
  buildx: Docker Buildx (Docker Inc.)
    Version:  v0.11.2
    Path:     /usr/libexec/docker/cli-plugins/docker-buildx
  compose: Docker Compose (Docker Inc.)
    Version:  v2.23.0
    Path:     /usr/libexec/docker/cli-plugins/docker-compose

Server:
 Containers: 11
  Running: 1
  Paused: 0
  Stopped: 10
 Images: 1
 Server Version: 25.0.0-beta.1
 Storage Driver: overlay2
  Backing Filesystem: extfs
  Supports d_type: true
  Using metacopy: false
  Native Overlay Diff: true
  userxattr: false
 Logging Driver: json-file
 Cgroup Driver: cgroupfs
 Cgroup Version: 1
 Plugins:
  Volume: local
  Network: bridge host ipvlan macvlan null overlay
  Log: awslogs fluentd gcplogs gelf journald json-file local logentries splunk syslog
 Swarm: inactive
 Runtimes: io.containerd.runc.v2 runc
 Default Runtime: runc
 Init Binary: docker-init
 containerd version: 61f9fd88f79f081d64d6fa3bb1a0dc71ec870523
 runc version: v1.1.9-0-gccaecfc
 init version: de40ad0
 Security Options:
  seccomp
   Profile: builtin
 Kernel Version: 3.10.0-957.1.3.el7.x86_64
 Operating System: CentOS Linux 7 (Core)
 OSType: linux
 Architecture: x86_64
 CPUs: 1
 Total Memory: 1.795GiB
 Name: iZbp128dczen7roibd3xciZ
 ID: 46e22e2d-905e-441a-bb4d-5419a5e3238c
 Docker Root Dir: /var/lib/docker
 Debug Mode: false
 Experimental: false
 Insecure Registries:
  127.0.0.0/8
 Registry Mirrors:
  https://hccwwfjl.mirror.aliyuncs.com/
 Live Restore Enabled: false

WARNING: bridge-nf-call-iptables is disabled
WARNING: bridge-nf-call-ip6tables is disabled
11、查看命令帮助信息
1)查看全部
命令:
docker示例:
[root@xxx ~]# docker

Usage:  docker [OPTIONS] COMMAND

A self-sufficient runtime for containers

Common Commands:
  run         Create and run a new container from an image
  exec        Execute a command in a running container
  ps          List containers
  build       Build an image from a Dockerfile
  pull        Download an image from a registry
  push        Upload an image to a registry
  images      List images
  login       Log in to a registry
  logout      Log out from a registry
  search      Search Docker Hub for images
  version     Show the Docker version information
  info        Display system-wide information

Management Commands:
  builder     Manage builds
  buildx*     Docker Buildx (Docker Inc., v0.11.2)
  compose*    Docker Compose (Docker Inc., v2.23.0)
  container   Manage containers
  context     Manage contexts
  image       Manage images
  manifest    Manage Docker image manifests and manifest lists
  network     Manage networks
  plugin      Manage plugins
  system      Manage Docker
  trust       Manage trust on Docker images
  volume      Manage volumes

Swarm Commands:
  swarm       Manage Swarm

Commands:
  attach      Attach local standard input, output, and error streams to a running container
  commit      Create a new image from a container's changes
  cp          Copy files/folders between a container and the local filesystem
  create      Create a new container
  diff        Inspect changes to files or directories on a container's filesystem
  events      Get real time events from the server
  export      Export a container's filesystem as a tar archive
  history     Show the history of an image
  import      Import the contents from a tarball to create a filesystem image
  inspect     Return low-level information on Docker objects
  kill        Kill one or more running containers
  load        Load an image from a tar archive or STDIN
  logs        Fetch the logs of a container
  pause       Pause all processes within one or more containers
  port        List port mappings or a specific mapping for the container
  rename      Rename a container
  restart     Restart one or more containers
  rm          Remove one or more containers
  rmi         Remove one or more images
  save        Save one or more images to a tar archive (streamed to STDOUT by default)
  start       Start one or more stopped containers
  stats       Display a live stream of container(s) resource usage statistics
  stop        Stop one or more running containers
  tag         Create a tag TARGET_IMAGE that refers to SOURCE_IMAGE
  top         Display the running processes of a container
  unpause     Unpause all processes within one or more containers
  update      Update configuration of one or more containers
  wait        Block until one or more containers stop, then print their exit codes

Global Options:
      --config string      Location of client config files (default "/root/.docker")
  -c, --context string     Name of the context to use to connect to the daemon (overrides DOCKER_HOST env var and default context set with "docker context use")
  -D, --debug              Enable debug mode
  -H, --host list          Daemon socket to connect to
  -l, --log-level string   Set the logging level ("debug", "info", "warn", "error", "fatal") (default "info")
      --tls                Use TLS; implied by --tlsverify
      --tlscacert string   Trust certs signed only by this CA (default "/root/.docker/ca.pem")
      --tlscert string     Path to TLS certificate file (default "/root/.docker/cert.pem")
      --tlskey string      Path to TLS key file (default "/root/.docker/key.pem")
      --tlsverify          Use TLS and verify the remote
  -v, --version            Print version information and quit

Run 'docker COMMAND --help' for more information on a command.

For more help on how to use Docker, head to https://docs.docker.com/go/guides/
2)查看某个命令
命令:
docker command --help示例:查看run命令的帮助信息
[root@xxx ~]# docker run --help

Usage:  docker run [OPTIONS] IMAGE [COMMAND] [ARG...]

Create and run a new container from an image

Aliases:
  docker container run, docker run

Options:
      --add-host list                    Add a custom host-to-IP mapping (host:ip)
      --annotation map                   Add an annotation to the container (passed through to the OCI runtime) (default map[])
  -a, --attach list                      Attach to STDIN, STDOUT or STDERR
      --blkio-weight uint16              Block IO (relative weight), between 10 and 1000, or 0 to disable (default 0)
      --blkio-weight-device list         Block IO weight (relative device weight) (default [])
      --cap-add list                     Add Linux capabilities
      --cap-drop list                    Drop Linux capabilities
      --cgroup-parent string             Optional parent cgroup for the container
      --cgroupns string                  Cgroup namespace to use (host|private)
                                         'host':    Run the container in the Docker host's cgroup namespace
                                         'private': Run the container in its own private cgroup namespace
                                         '':        Use the cgroup namespace as configured by the
                                                    default-cgroupns-mode option on the daemon (default)
      --cidfile string                   Write the container ID to the file
      --cpu-period int                   Limit CPU CFS (Completely Fair Scheduler) period
      --cpu-quota int                    Limit CPU CFS (Completely Fair Scheduler) quota
      --cpu-rt-period int                Limit CPU real-time period in microseconds
      --cpu-rt-runtime int               Limit CPU real-time runtime in microseconds
  -c, --cpu-shares int                   CPU shares (relative weight)
      --cpus decimal                     Number of CPUs
      --cpuset-cpus string               CPUs in which to allow execution (0-3, 0,1)
      --cpuset-mems string               MEMs in which to allow execution (0-3, 0,1)
  -d, --detach                           Run container in background and print container ID
      --detach-keys string               Override the key sequence for detaching a container
      --device list                      Add a host device to the container
      --device-cgroup-rule list          Add a rule to the cgroup allowed devices list
      --device-read-bps list             Limit read rate (bytes per second) from a device (default [])
      --device-read-iops list            Limit read rate (IO per second) from a device (default [])
      --device-write-bps list            Limit write rate (bytes per second) to a device (default [])
      --device-write-iops list           Limit write rate (IO per second) to a device (default [])
      --disable-content-trust            Skip image verification (default true)
      --dns list                         Set custom DNS servers
      --dns-option list                  Set DNS options
      --dns-search list                  Set custom DNS search domains
      --domainname string                Container NIS domain name
      --entrypoint string                Overwrite the default ENTRYPOINT of the image
  -e, --env list                         Set environment variables
      --env-file list                    Read in a file of environment variables
      --expose list                      Expose a port or a range of ports
      --gpus gpu-request                 GPU devices to add to the container ('all' to pass all GPUs)
      --group-add list                   Add additional groups to join
      --health-cmd string                Command to run to check health
      --health-interval duration         Time between running the check (ms|s|m|h) (default 0s)
      --health-retries int               Consecutive failures needed to report unhealthy
      --health-start-interval duration   Time between running the check during the start period (ms|s|m|h) (default 0s)
      --health-start-period duration     Start period for the container to initialize before starting health-retries countdown (ms|s|m|h) (default 0s)
      --health-timeout duration          Maximum time to allow one check to run (ms|s|m|h) (default 0s)
      --help                             Print usage
  -h, --hostname string                  Container host name
      --init                             Run an init inside the container that forwards signals and reaps processes
  -i, --interactive                      Keep STDIN open even if not attached
      --ip string                        IPv4 address (e.g., 172.30.100.104)
      --ip6 string                       IPv6 address (e.g., 2001:db8::33)
      --ipc string                       IPC mode to use
      --isolation string                 Container isolation technology
      --kernel-memory bytes              Kernel memory limit
  -l, --label list                       Set meta data on a container
      --label-file list                  Read in a line delimited file of labels
      --link list                        Add link to another container
      --link-local-ip list               Container IPv4/IPv6 link-local addresses
      --log-driver string                Logging driver for the container
      --log-opt list                     Log driver options
      --mac-address string               Container MAC address (e.g., 92:d0:c6:0a:29:33)
  -m, --memory bytes                     Memory limit
      --memory-reservation bytes         Memory soft limit
      --memory-swap bytes                Swap limit equal to memory plus swap: '-1' to enable unlimited swap
      --memory-swappiness int            Tune container memory swappiness (0 to 100) (default -1)
      --mount mount                      Attach a filesystem mount to the container
      --name string                      Assign a name to the container
      --network network                  Connect a container to a network
      --network-alias list               Add network-scoped alias for the container
      --no-healthcheck                   Disable any container-specified HEALTHCHECK
      --oom-kill-disable                 Disable OOM Killer
      --oom-score-adj int                Tune host's OOM preferences (-1000 to 1000)
      --pid string                       PID namespace to use
      --pids-limit int                   Tune container pids limit (set -1 for unlimited)
      --platform string                  Set platform if server is multi-platform capable
      --privileged                       Give extended privileges to this container
  -p, --publish list                     Publish a container's port(s) to the host
  -P, --publish-all                      Publish all exposed ports to random ports
      --pull string                      Pull image before running ("always", "missing", "never") (default "missing")
  -q, --quiet                            Suppress the pull output
      --read-only                        Mount the container's root filesystem as read only
      --restart string                   Restart policy to apply when a container exits (default "no")
      --rm                               Automatically remove the container when it exits
      --runtime string                   Runtime to use for this container
      --security-opt list                Security Options
      --shm-size bytes                   Size of /dev/shm
      --sig-proxy                        Proxy received signals to the process (default true)
      --stop-signal string               Signal to stop the container
      --stop-timeout int                 Timeout (in seconds) to stop a container
      --storage-opt list                 Storage driver options for the container
      --sysctl map                       Sysctl options (default map[])
      --tmpfs list                       Mount a tmpfs directory
  -t, --tty                              Allocate a pseudo-TTY
      --ulimit ulimit                    Ulimit options (default [])
  -u, --user string                      Username or UID (format: <name|uid>[:<group|gid>])
      --userns string                    User namespace to use
      --uts string                       UTS namespace to use
  -v, --volume list                      Bind mount a volume
      --volume-driver string             Optional volume driver for the container
      --volumes-from list                Mount volumes from the specified container(s)
  -w, --workdir string                   Working directory inside the container
五、示例-部署mysql
基于Docker Desktop环境
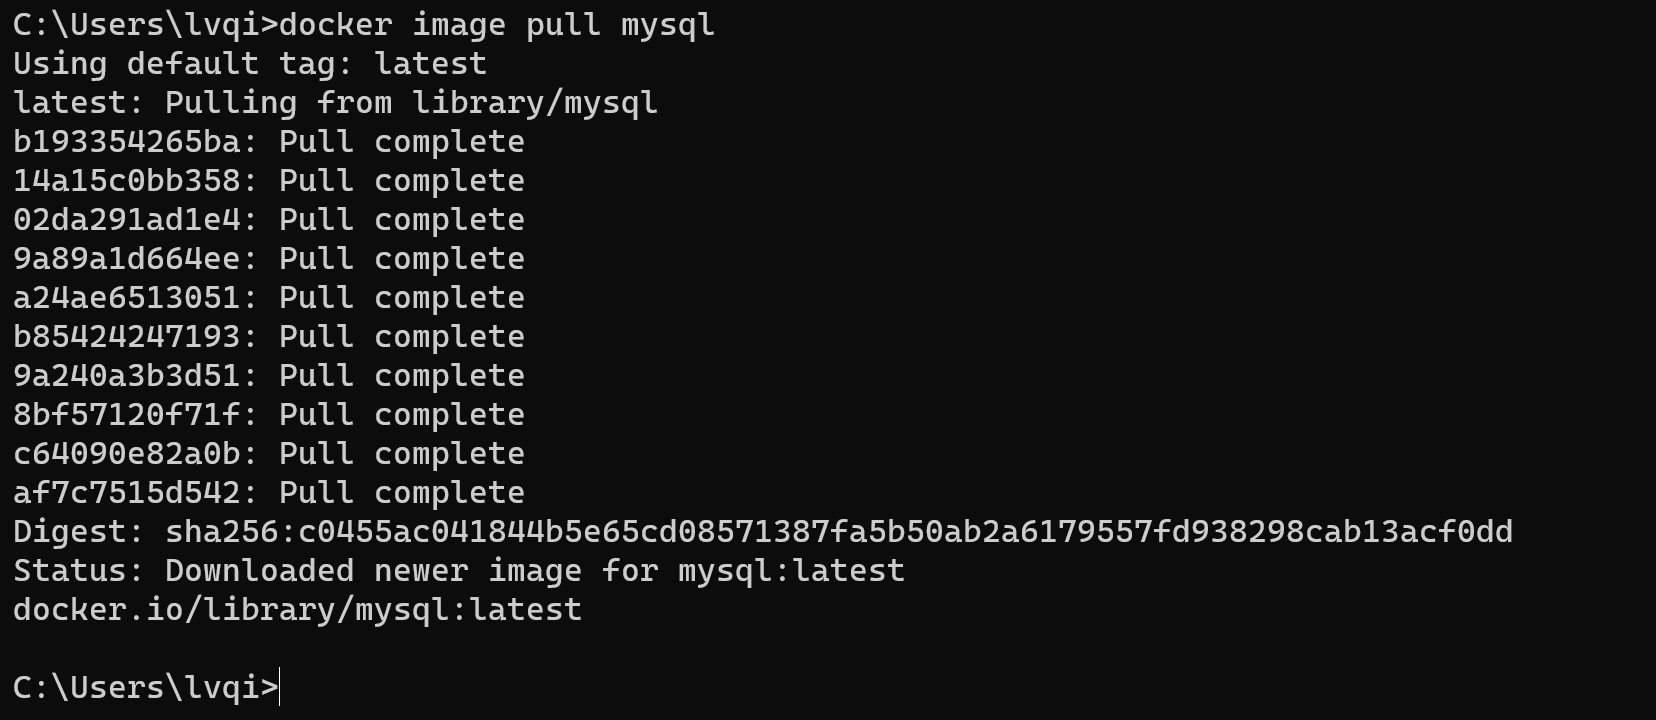
1、拉取镜像
这里可以直接使用他人已经制作好的镜像
docker image pull mysql
2、启动容器
第一次执行,需要先创建容器并启动(容器名是自定义,这里命名为mysql):
docker run --name mysql -d -p 6666:3306 -e MYSQL_ROOT_PASSWORD=1234 mysql后续 直接执行 docker start 容器名即可:
docker start mysql
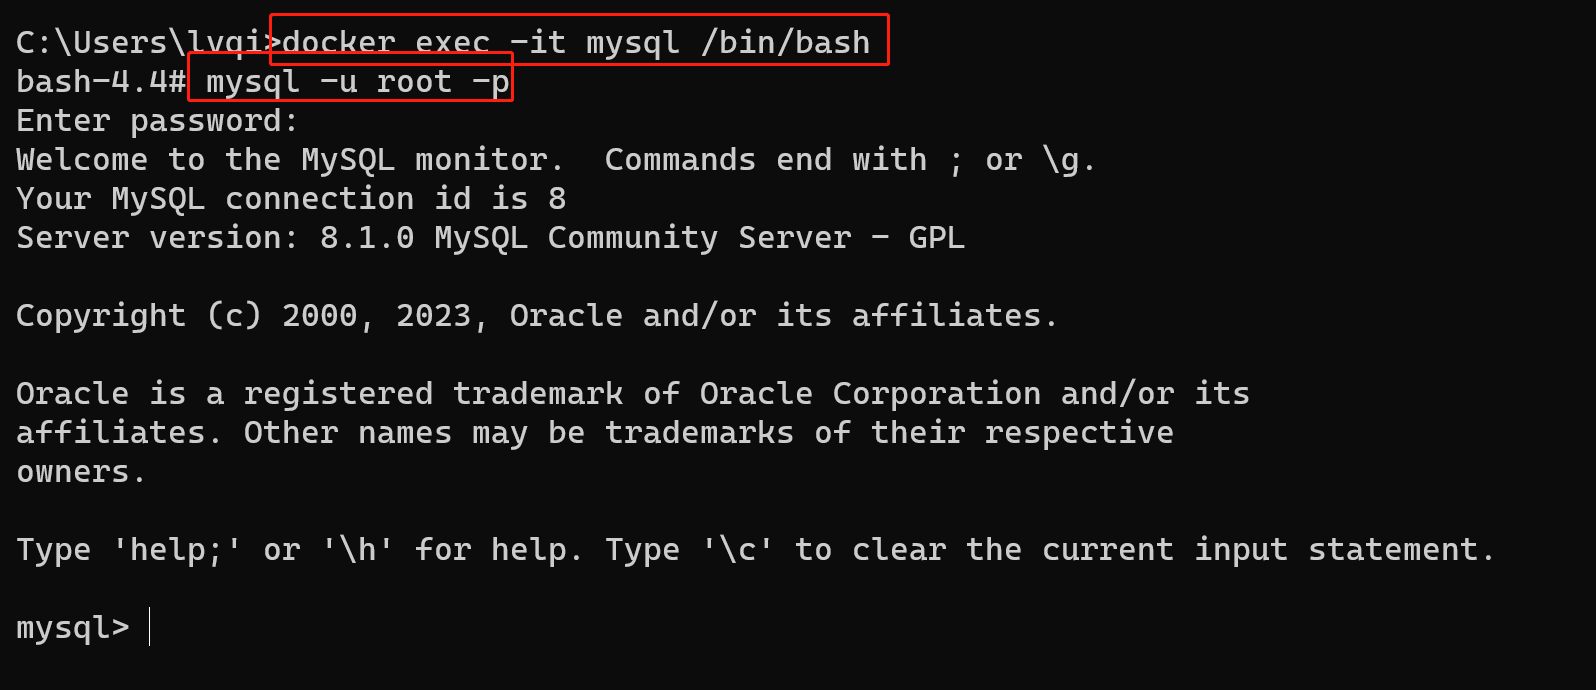
进入mysql 交互环境,使用创建容器时设置的账户密码登录mysql环境
docker exec -it mysql /bin/bash mysql -u root -p
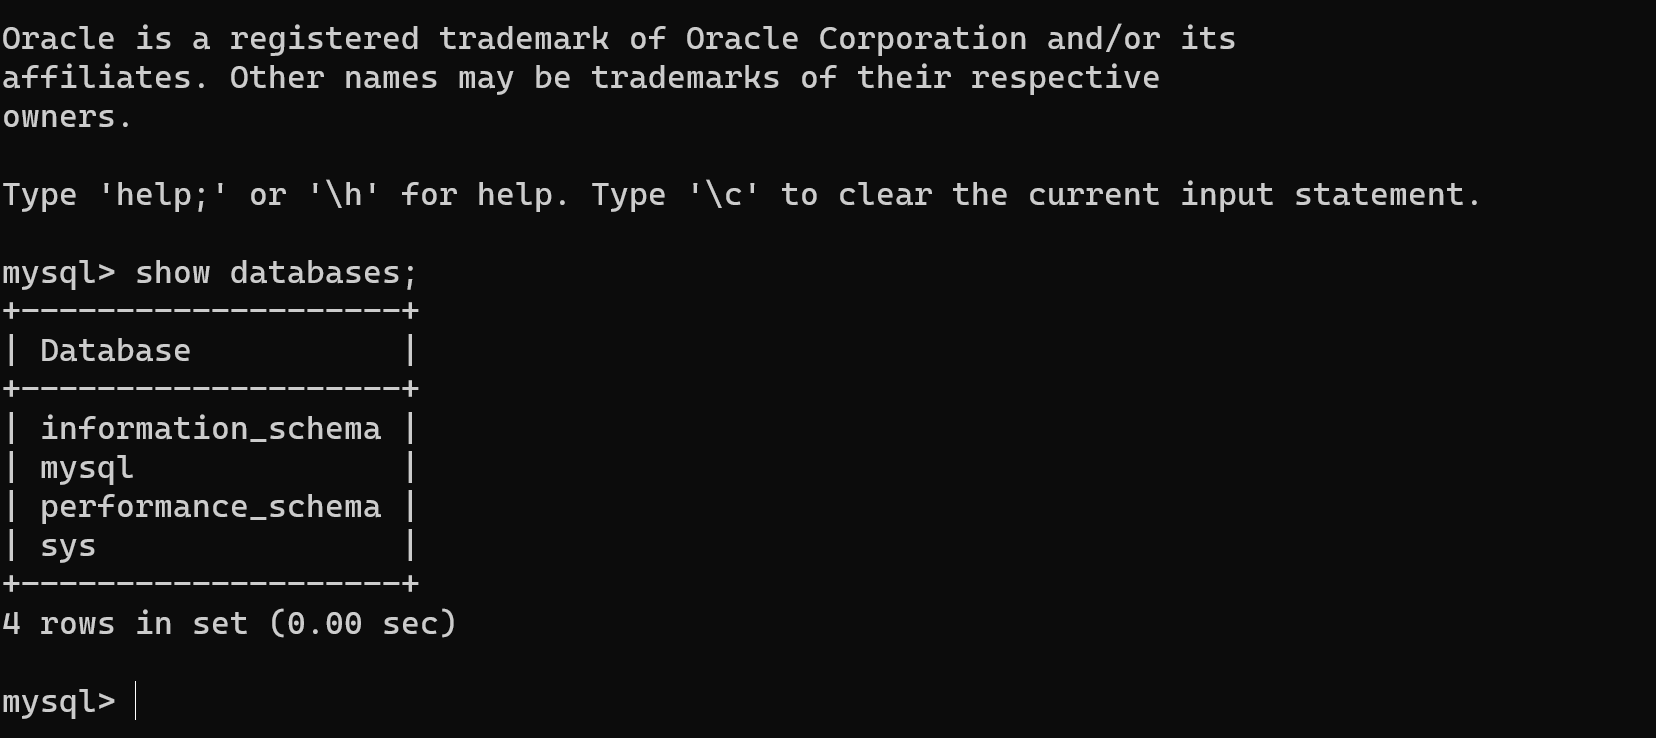
3、使用mysql
接下来可以愉快的执行mysql相关命令啦! 比如查看数据库 show databases、创建数据库 create databses; 创建表 create table等。
六、示例-部署springboot
这里总结SpringBoot应用如何通过docker部署。
1、源码打包
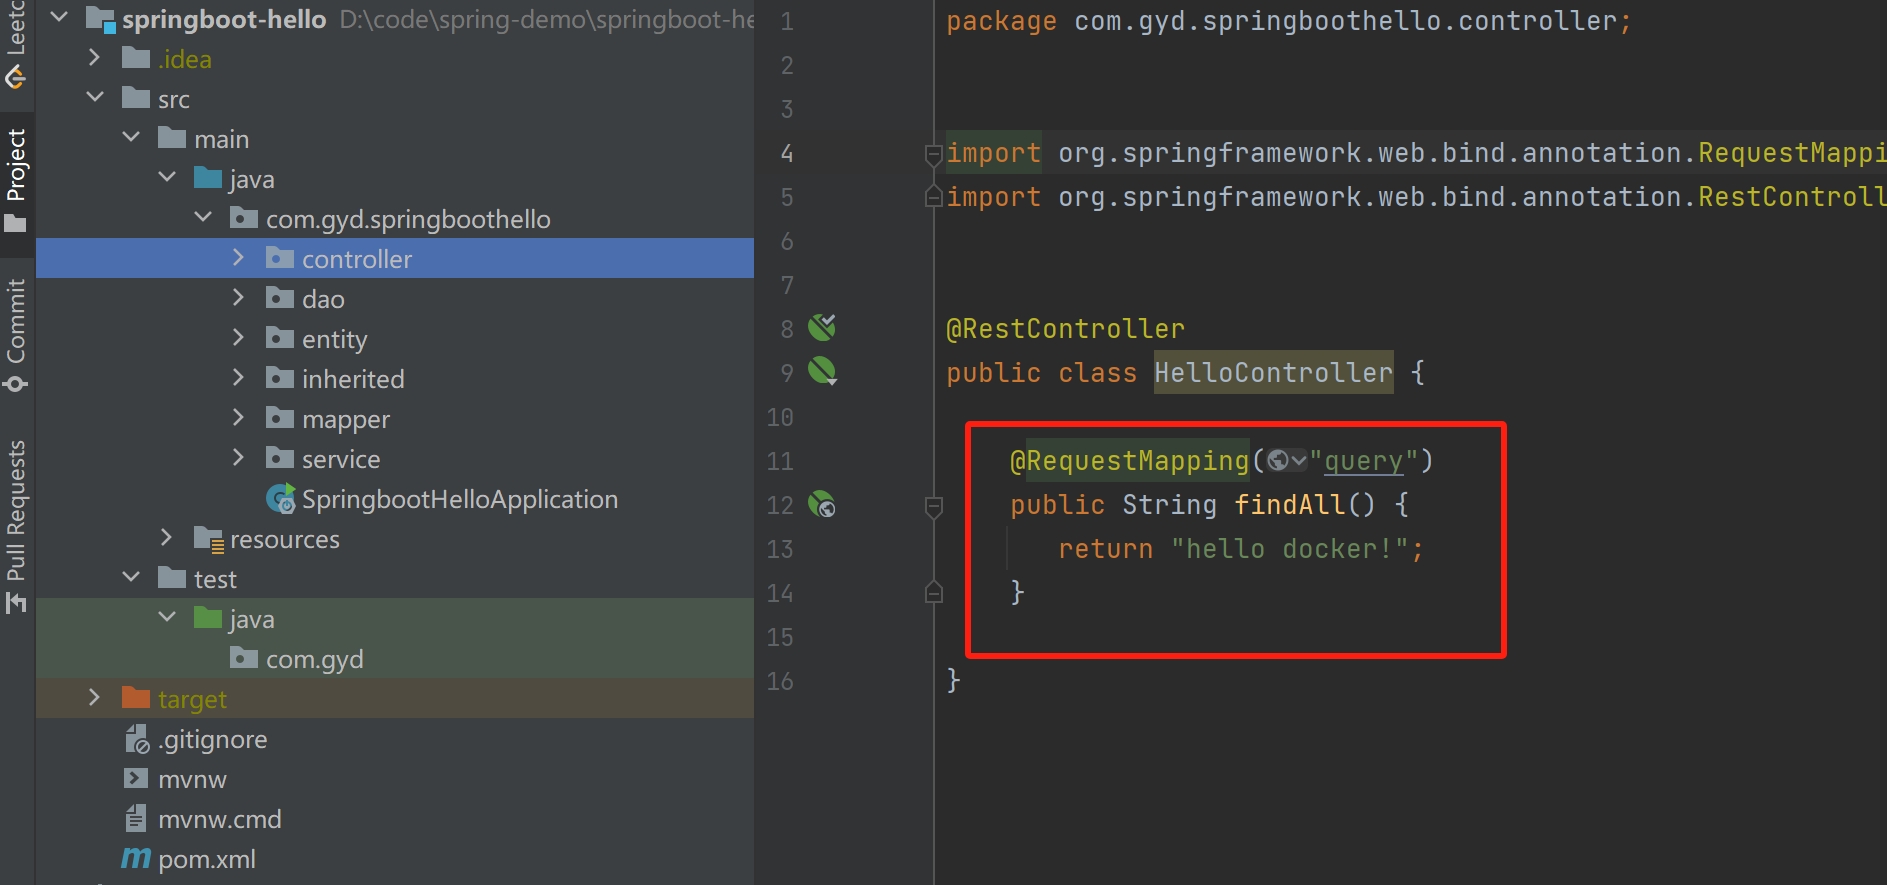
小郭写了一个简单的springboot工程,对外提供一个查询接口(用于部署后的访问验证)。源代码地址
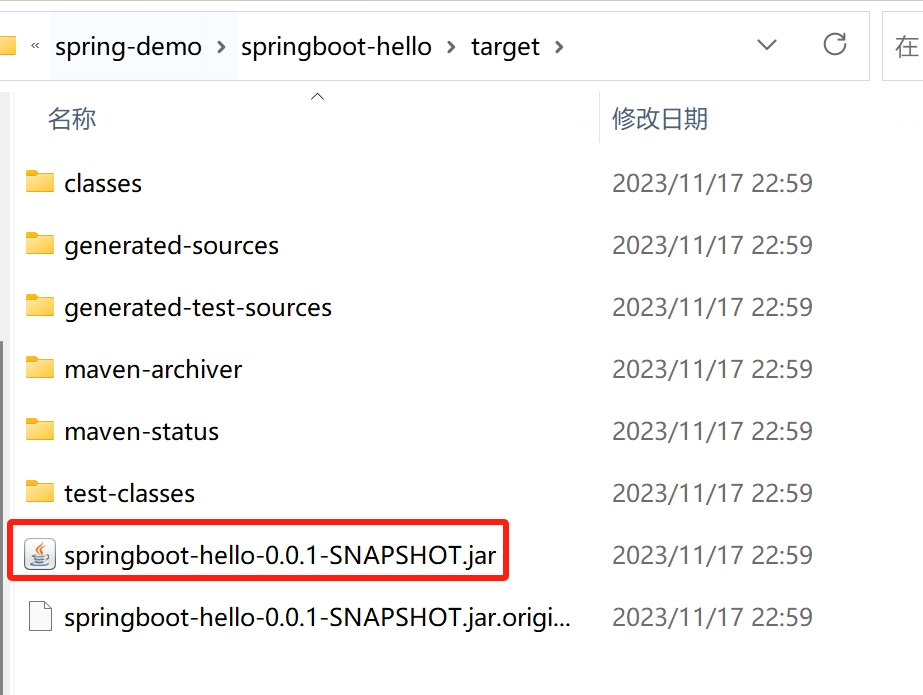
在springboot应用源代码目录下,使用mvn clean package命令:
mvn clean package生成的jar包如下:
2、制作镜像
有了程序jar包springboot-hello-0.0.1-SNAPSHOT.jar,按传统的方式执行只需要执行java -jar springboot-hello-0.0.1-SNAPSHOT.jar即可运行了。 如果要使用docker部署,则还需要将jar包制作成docker中的镜像文件。
制作镜像文件需要先创建一个镜像配置描述文件Dockerfile。
我们可以选择在本地先写好Dockerfile,然后和jar一起上传安装了docker环境的服务器上。或者直接在docker服务器上编写Dockerfile。
小郭这里选择的方式是先将jar上传到了docker服务器上,然后在相同目录下写好Dockerfile文件。

Dockerfile中的配置内容:
# 基于哪个镜像(可以是本地已经有的镜像或者远程仓库有的镜像)
FROM adoptopenjdk/openjdk8
# 将本地文件夹挂载到当前容器
VOLUME /home/guoyd/tmp
# 拷贝文件到容器,也可以直接写成ADD xxxxx.jar /app.jar
ADD springboot-hello-0.0.1-SNAPSHOT.jar hello-spring.jar
RUN bash -c 'touch /hello-spring.jar'
# 声明需要暴露的端口
EXPOSE 8081
# 配置容器启动后执行的命令
ENTRYPOINT ["java","-Djava.security.egd=file:/dev/./urandom","-jar","/hello-spring.jar"]
接下来在Dockerfile所在目录下执行镜像制作命令:
root@XXX docker-hello-spring-boot]# docker build -t guoyading/hello-docker .
[+] Building 47.9s (8/8) FINISHED                                                                                                                                                          docker:default
 => [internal] load build definition from Dockerfile                                                                                                                                                 0.9s
 => => transferring dockerfile: 499B                                                                                                                                                                 0.0s
 => [internal] load metadata for docker.io/adoptopenjdk/openjdk8:latest                                                                                                                             18.0s
 => [internal] load .dockerignore                                                                                                                                                                    0.1s
 => => transferring context: 2B                                                                                                                                                                      0.0s
 => [internal] load build context                                                                                                                                                                    7.0s
 => => transferring context: 41.45MB                                                                                                                                                                 6.0s
 => CACHED [1/3] FROM docker.io/adoptopenjdk/openjdk8:latest@sha256:869502b9b6ea689c27cc418d41d917a3ad4035aa82f0d92ac66935b61c31d7cb                                                                 1.0s
 => => resolve docker.io/adoptopenjdk/openjdk8:latest@sha256:869502b9b6ea689c27cc418d41d917a3ad4035aa82f0d92ac66935b61c31d7cb                                                                        1.0s
 => [2/3] ADD springboot-hello-0.0.1-SNAPSHOT.jar hello-spring.jar                                                                                                                                   2.0s
 => [3/3] RUN bash -c 'touch /hello-spring.jar'                                                                                                                                                      5.0s
 => exporting to image                                                                                                                                                                               8.1s
 => => exporting layers                                                                                                                                                                              8.0s
 => => writing image sha256:b4b07c3a1eedf170dfe7ea86f2c5c1b2d099ce6dc74925590f89a54ad1c047d7                                                                                                         0.0s
 => => naming to docker.io/guoyading/hello-docker                                                                                                                                                    0.1s
最后我们查看本地的镜像中是否已经生成了对应的springboot程序镜像:
[root@XXX docker-hello-spring-boot]# docker images
REPOSITORY               TAG       IMAGE ID       CREATED        SIZE
guoyading/hello-docker   latest    fdb7e6b10d09   12 hours ago   403MB
hello-world              latest    9c7a54a9a43c   6 months ago   13.3kB
3、启动容器
现在我们基于已经制作好的镜像guoyading/hello-docker 来启动docker容器:
[root@XXX docker-hello-spring-boot]# docker run   -p 8081:8081 guoyading/hello-docker

  .   ____          _            __ _ _
 /\\ / ___'_ __ _ _(_)_ __  __ _ \ \ \ \
( ( )\___ | '_ | '_| | '_ \/ _` | \ \ \ \
 \\/  ___)| |_)| | | | | || (_| |  ) ) ) )
  '  |____| .__|_| |_|_| |_\__, | / / / /
 =========|_|==============|___/=/_/_/_/
 :: Spring Boot ::               (v2.7.14)

2023-11-18 03:53:12.299  INFO 1 --- [           main] c.g.s.SpringbootHelloApplication         : Starting SpringbootHelloApplication v0.0.1-SNAPSHOT using Java 1.8.0_312 on c0f239855106 with PID 1 (/hello-spring.jar started by root in /)
2023-11-18 03:53:12.308  INFO 1 --- [           main] c.g.s.SpringbootHelloApplication         : No active profile set, falling back to 1 default profile: "default"
2023-11-18 03:53:46.280  INFO 1 --- [           main] o.s.b.w.embedded.tomcat.TomcatWebServer  : Tomcat initialized with port(s): 8081 (http)
2023-11-18 03:53:46.311  INFO 1 --- [           main] o.apache.catalina.core.StandardService   : Starting service [Tomcat]
2023-11-18 03:53:46.312  INFO 1 --- [           main] org.apache.catalina.core.StandardEngine  : Starting Servlet engine: [Apache Tomcat/9.0.78]
2023-11-18 03:53:50.226  INFO 1 --- [           main] o.a.c.c.C.[Tomcat].[localhost].[/]       : Initializing Spring embedded WebApplicationContext
2023-11-18 03:53:50.226  INFO 1 --- [           main] w.s.c.ServletWebServerApplicationContext : Root WebApplicationContext: initialization completed in 34967 ms
4、测试访问
[root@XXX ~]# curl localhost:8081/query
hello docker!
5、后台启动
上面启动容器后,如果关掉当前命令窗口,则容器会停止运行(), docker支持,只需要在启动命令后增加参数-d即可。
docker run -d -p 8081:8081 guoyading/hello-docker